theraineysisters knitting and so much more

April 19, 2022

From Susan — Tee Hee

Filed under: Updates — lv2knit @ 6:23 pm

I just finished a really cute, fun sweater: the Tii Pullover designed by Joji Locatelli.  Yes, another Joji!  When I first saw it, I was intrigued by the ornate cable on the front:

Upon further investigation, I discovered that the cable itself is quite simple.

The two halves (right and left) are knit as separate pieces that are only attached by an inch of knitting at the neck:


The Sweater before Blocking

Then the halves are joined by two long pieces of i-cord:


The front


The Back

Wow!  Mind blown!!

I dropped the front neck 10 rows and added a split hem, but otherwise pretty much followed the pattern.  I knit it in Lettlopi, which is known for being a very wooly wool.  It blocked out beautifully.  Not the softest sweater, but I love the feel of it, scrumptious and squishy.  This is a winner!!


April 12, 2022

From Susan — A New Way to Cast On I-Cord!!

Filed under: Updates — lv2knit @ 8:50 pm

I am really excited to share what I think is a new technique for casting on i-cord.  There are so many people at my LYS BeWoolen knitting blankets, many of which have an i-cord border.  My Surrounded Afghan also has a built-in i-cord border.  But standard methods of casting on either result in really enlarged sts or the cumbersome task of knitting i-cord and then picking up sts.  I used this second method on my pattern.

I kept thinking there must be a better way.  All my attempts created the enlarged sts.  I realized it’s because the sts are being created by the yarn that is carried behind the i-cord — there is slack that you just can’t get rid of.  My method doesn’t do it that way.

My technique uses a provisional cast on.  You “bind off” and then work the other side of the sts.

The step-by-step instructions are included in the following pdf.  I have also made a 10 minute youtube video that shows all the steps.  Let me know what you think!!

The following pdf was changed on April 13, 2022 to include a 4-stitch version!!

Susan Rainey’s I-Cord Cast On

April 9, 2022

From Susan — Birthday Pin

Filed under: Updates — lv2knit @ 6:48 pm

I made a shawl pin as a gift for a fellow knitter on her “special” birthday!

April 2, 2022

From Susan — Pin Up

Filed under: Updates — lv2knit @ 4:21 pm

The second shawl pin!

March 27, 2022

From Susan — Stick a Pin in It!!

Filed under: Updates — lv2knit @ 3:56 pm

Well, as promised I am here to update you on my status as a Dorset shawl pin maker.  I am a Dorset shawl pin maker!  I tried it out today and in two hours had created a shawl pin!  I did make a small one (1-1/8 inches), so those take less time.

Step 1: Cast the Ring — this is the time consuming/annoying part!

Step 2: Slick the Ring — this just means nudging the knotted edge to the back.

Step 3: Decorate — I chose a simple design called Bachelor Buttons

Step 4: Add the side rings that make this a shawl pin

Step 5: Make Stick Pin — I used an existing shawl pin stick

Because mine is a bit small, I think it would look really cute on a sweater!

The supplies are plastic rings, perle coton #5 and/or 8, needles, and metallic thread.  The sticks she uses are bamboo skewers that we all have in our kitchens!

There you have it!  Pat Olski has all of her knowledge and creativity available in numerous books and magazines.  I got my information from Crafting Thread Shawl Pins.

March 24, 2022

From Susan — Dorset Shawl Pins and More!

Filed under: Updates — lv2knit @ 11:43 am

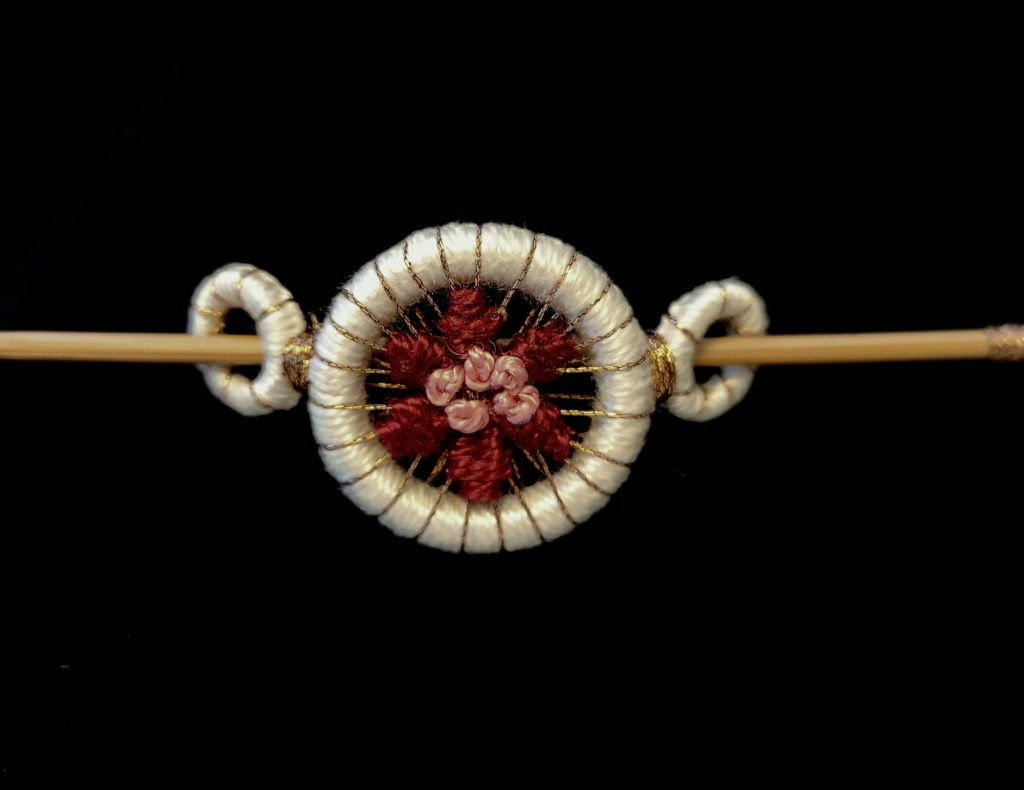
I just got a wonderful book written by Pat Olski called Crafting Thread Shawl Pins It is a stunner!  The pins are absolutely gorgeous.  I hope to make a few but haven’t quite gotten there yet.  Here is the cover:

And a really pretty pin:

They are all so beautiful.  You can match the colors to your favorite, special shawl or sweater.  Or make your own buttons.  The illustrations are extremely clear and the instructions well written.  I will post updates on my progress!

I also embarked on some brioche knitting…syncopated brioche to be exact.  Syncopated brioche turns some standard “rules” on their head.  When knitting typical brioche, one color is dominant and worked as knit brioche sts, and the other worked as purl.  In the following Diamond Lattice Cowl, both colors are dominant.  Mind blown!

Had to make another!!

I used Malabrigo Rios, colors Cereza and Pearl Ten for the red/gray, Lettuce and Aquas for the green.  One skein of each color.  I will be teaching this as a class at BeWoolen next month.

And for those of you knitting tubular cowls that need to be grafted together, read my tip about getting started and easier grafting in The Rainey Sisters Ravelry group!!  I learned a lot about what NOT to do when grafting this friend’s Velvet Mirror Cowl!


March 11, 2022

From Susan — Always There: Stuff to Fix!!

Filed under: Updates — lv2knit @ 1:43 pm

I just finished a cute, wearable cardigan: Always There by Joji Locatelli.  The pattern had some issues, but then so did I!!  The yarn was purchased at BeWoolen — my LYS and home away from home!  Just 1.4 miles away, it’s not only close, but well stocked with nice yarn and even nicer people!

Here is my finished cardigan.  I made several mods to the pattern itself, but looking at it you wouldn’t know.

It fits perfectly, except the sleeves may be a bit too long.  I will wear it a couple of times to make sure and then might shorten them.

The yarn is their own BeWoolen DK, color Midsummer Sky.  I snagged it on their official opening weekend, so it has been marinating a while.  As with any hand-dyed yarn, you have to expect some variation.  So what I did instead of alternating skeins was to change skeins at section breaks — when changing from stockinette to twisted rib for instance.  It really worked!  The color changes created broad stripes, instead of  color breaks in the middle of a section.  One of the skeins was a true outlier.  I would not have used it at all but I realized I needed every gram!  It forms the lightest stripe in the low end of the sweater, but somehow in the sleeves, it caused hideous white stripes!

Because I matched the skeins on the sleeves, both sleeves had the same hideous striping.  So, I tie dyed them!  I bought turquoise tie dye and dyed the bad sections!  As I was slathering on the dye, I suddenly realized that it could go horribly wrong, but it was too late!  All I wanted was to add a little blue color to the white areas, so I didn’t let it set very long.  I immediately soaked and blocked it.  The results: perfection, and shock that it worked!!

ETA: I used Tulip One-Step Tie Dye, color Turquoise.  I used the refill powder and mixed it with more water to make the color lighter, testing it on white fabric.  I applied it to the white areas and kind of massaged it in.  I placed the treated sleeve areas in a bowl of salted vinegar water for a short time to set the color, then soaked and blocked as usual.  The tie dye instructions say to wait 6-8 hours, but I waited closer to 6-8 minutes!!

After it dried, I went to sew on the buttons.  I harvested gorgeous glass buttons off an older sweater that I no longer wear.  As I was marking where to sew them I realized I had made a mistake…

  1. Buttonholes need to be evenly spaced.  I do this by counting sts in between the buttonholes — or in the case of ribbing, the ribs between buttonholes.
  2. Knitters can’t count.

Okay, then.  I had miscounted the ribs between two buttonholes!  9 instead of 8 like the others.  The extra space wouldn’t be noticeable between the buttonholes, but it would be noticed between my stunning buttons.  I thought it was beyond fixing, but of course it bothered me.  So, I cut the bind off yarn, ripped back the bind off across the bottom two buttonholes, and re-positioned them one rib higher.  It’s funny because at the time I thought the last buttonhole seemed like it was closer to the bottom than I had planned.  Listen to that little voice in your head!!  I could have fixed it much easier when knitting the band!!!

So the problems are fixed, except for the sleeve length.  I will hold off on judgment until it’s worn.  Sometimes sleeves creep up when you wear a shirt underneath.  I am super pleased with this after all is said and done.

And I have never understood people who don’t block their knitting!!  This thing was FUGLY before I blocked it, but I had hope!!!  This picture was taken moments before my tie dye extravaganza!!  😉

PS to Christina — I don’t really have any advice for you on this.  I’ve never done a faux buttonband so have no advice to offer.  Maybe post your question on Ravelry, either in the Techniques secton or within Joji’s Ravelry group.

March 2, 2022

From Susan — Merry Christmas to Me!!

Filed under: Updates — lv2knit @ 11:41 am

I received two knitting kits for Christmas this year.  One was my Oregon Vest, which I already posted about.  The other was my Tamback Scarf, designed by Carol Sunday.  Surly and I each bought one for the other for Christmas!  I felt “obligated” to get it on and off the needle ASAP!

When I saw this, I was just stunned!  It is such a unique design.  It was fun to knit, and a ton of work!  Check that box!!

February 15, 2022

From Susan — Happy Birthday to Surly!!

Filed under: Updates — lv2knit @ 9:35 am

Yes, it’s time again to celebrate Surly!!  Talented, funny, at times silly, Little Sister Surly!!  I miss my little sistie — and don’t know when we will be together again.  We talk often, but it’s really not the same.  But I have hopes for this year.

Happy Birthday from your big sis (“It’s the big one we don’t like!!”)!!

February 4, 2022

From Susan — Let the Games Begin!!

Filed under: Updates — lv2knit @ 8:14 pm

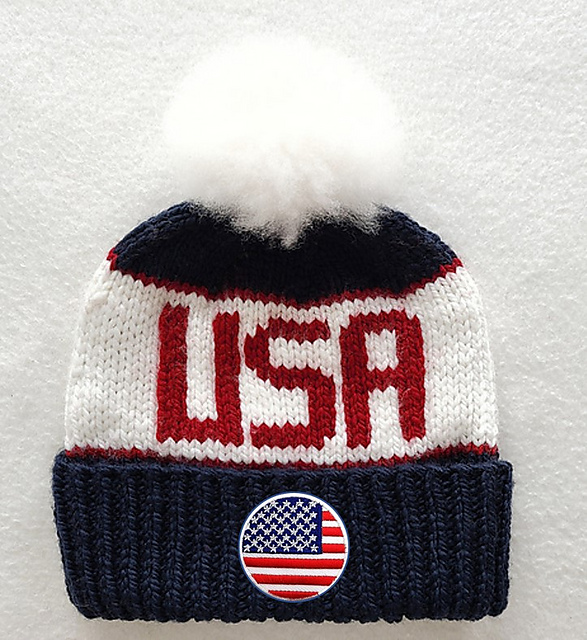
It’s really not too late to knit up my free 2022 Winter Games Hat!  It’s not as cute as 2018, but it’s done in bulky yarn which is all the rage!  Actually, it should have been knit in Malabrigo Rasta, but I was too cheap to use it for a free pattern.  😉  I used Cascade 128 yarn and included a Rasta recipe.  This is a fun, quick knit.  FYI: the word TEAM is on the other side!

« Newer PostsOlder Posts »

Powered by WordPress