Sometimes, it’s hard to decide what we like and don’t like in a design. Sometimes, it’s hard to know whether you like something until it’s finished. In fact, that’s the problem with knitting: you can spend hours creating a sweater, only to say “Hmm. That was a waste of my time.”
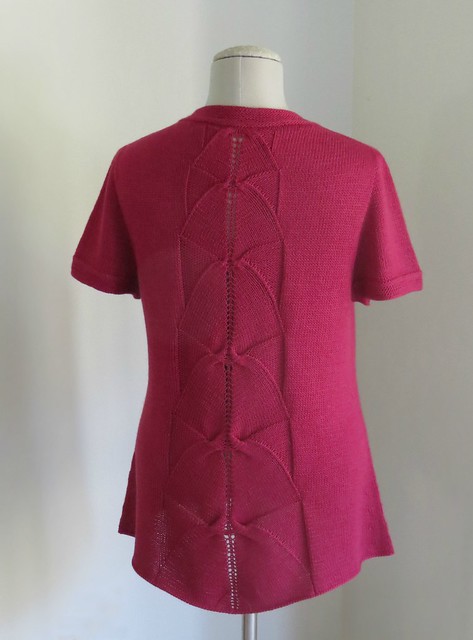
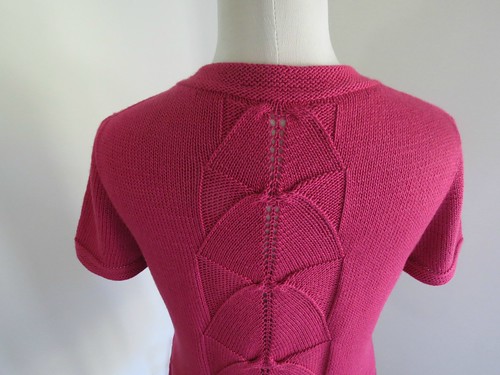
All this is by way of introduction to the modification I made to my Whiteness of the Whale. I confess: I liked the design that runs down the back of this pattern, but was ambivalent about the single “scallop” at the rear. Will this “whale tail” make my ass look like the size of Monstro in Pinocchio? I kept asking myself. But I kept going. I finished the body of the sweater a few days ago. Here is a photograph of Lucy wearing it.

See what I mean? Just.not.sure. I don’t have a photo of me in it, but what I really didn’t like is how it looked from the side. To me, it looked as if I had a droopy tail. My age-related drooping is not really something I want to accentuate.
What to do? I talked about it with Susan, who is also knitting this pattern and had similar concerns about the tail. It was, we decided, fixable. (Keep in mind that this was knitted from the top down, so the bind off is at the hem. Easy to rip back. Otherwise, this whale would be swimming with the fishes.) To understand the fix, you have to understand why and how there is a scallop in the first place. It’s due to the placement of the yarnovers and the decreases relative to each other. When you “pile” the yarnovers on top of each other, but have the corresponding decreases somewhere else, the fabric will bulge where the yarnovers are. That’s the principle behind ye olde favorite feather and fan stitch. So, I needed to place the decreases next to the yarnovers to mitigate the bulge. Fortunately, because the cables in the pattern periodically break up (and “undo”) the bulge build up, I didn’t need to go back too far.

I ripped out about three inches, to just where the last tail pattern started to go straight down instead of continuing to angle outward. (See the photo just above.) I then moved the decreases so that they were just about next to the yarnovers at the center of the pattern. I worked to within two stitches of the first yarnover from the previous right side row. Then I k2tog, k1 (the prior yarnover), yo, p, yo, k1, ssk and then kept working the rest of the row. I left a purl stitch on either side of the tail to help outline it a little bit. Here is what happened:


I am SO much happier with my sweater. Yes, the decreases are now somewhat visible next to the yarnovers in the center of the pattern, but for me that’s a worthwhile tradeoff. Moreover, the decreases were visible before where I had started to work straight, just in a different place, and this way I don’t have the corner that was produced by the curve to straight transition. (Note: If I had kept angling out the stiches as before, I still would have had a scallop.) Instead, the outer curve slopes gently down, and I think it looks more graceful. Susan had initially suggested I try using a central double decrease in between the two yarnovers, but when I swatched several ideas, the central double decrease disrupted the lines of the yarnovers.
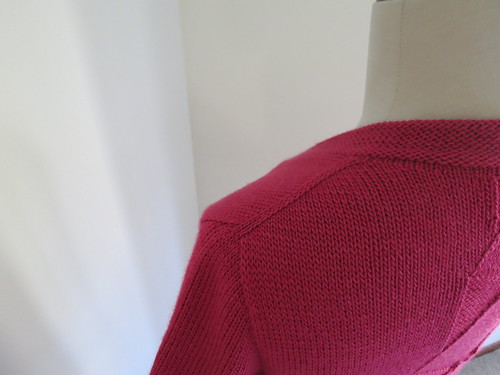
It is hard to capture the color of this yarn. It’s closest to the very last picture. Because it’s not blocked, you can see what looks like an abrupt color change near the bottom. That’s because I had lightly blocked the body when I finished knitting it the first time (to check for fit and length), and the new knitting isn’t blocked yet. It will all come out “in the wash.”


