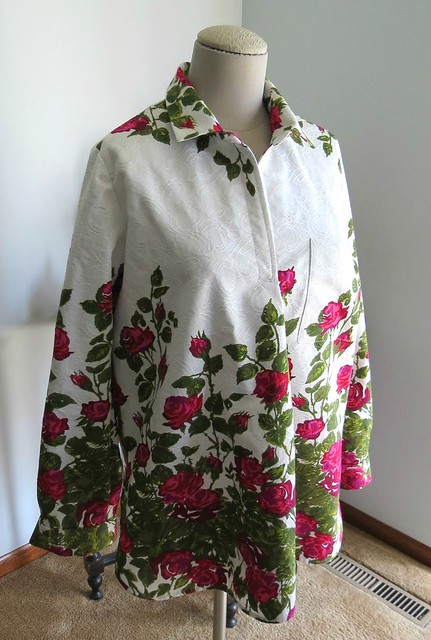
As you all know, I sew as well as knit. My sewing days don’t exactly predate my knitting days, but I did a lot more sewing early in my life. I bought some fabric a while back because it reminded me of a picture of me from kindergarten, which of course I cannot find. It also reminds me of a beautiful dress that my grandmother made for my mom. Anyway, I decided to branch out and use a different shirt pattern – you know, mix it up a bit! It went together extremely fast, but the fit just isn’t there. The finished shirt cannot be altered, and is almost wearable, but I will need to make changes the next time around. 
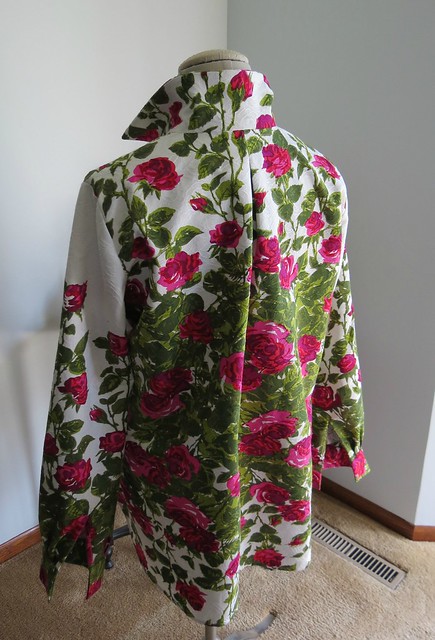
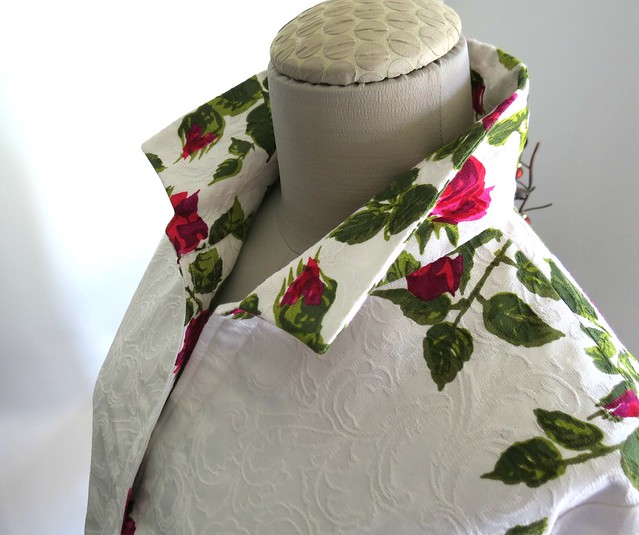
Back to the drawing board!! At least next time I will know what to change. I guess sewing is like knitting after all (in that you can make a sweater fit the SECOND time you knit it!), except you can’t finish a sweater in a day…
PS: I did attempt some minor alterations. I replaced the cuff with one an inch wider to add an inch to the sleeves – at that time I also converted the sleeve from an overlapping cuff to a French cuff because of the extra width. I also redid the sleeve seam right at the underarm and gained about a half inch. It fits a little better and the sleeves are much better! Still need a couple of buttons.
Daisy mentioned the layout of the motifs. That was a major challenge given the odd way the fabric was printed!
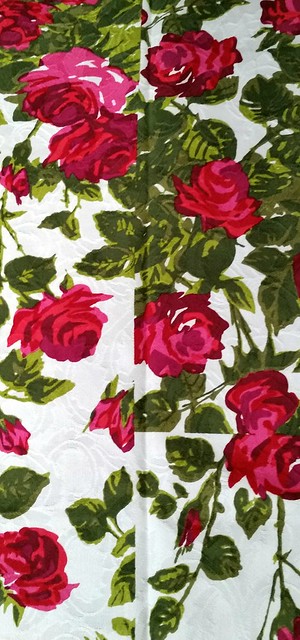
The lines you see are not seams — they are printed right onto the fabric!! Half the fabric had a more solidly printed design. It ran the length of the fabric, and undulated from really solid flowers to more open with more white background – you can see how it abruptly stops along the center line of the fabric, running along the entire length. I used that for the back, but had to seam it down the center to avoid the printlines. I had to match the layout of each half so the whiter areas would align.
The other half was printed in actual blocks about a yard long. You can see in the picture how the pattern just cuts off and completely changes! I could fit the front on one of these panels (and also the sleeves). There the motif went from very solidly printed to white. That is why there is so much white at the top of the sleeves and the front – I did plan it that way.
I feel much better about the shirt now and hope it goes more smoothly the next time around!!
PS2 to Connie: I have never made a muslin sample but it does seem like a good idea. I thought I had this covered because I had two shirts I was measuring from BUT I was lazy in my comparisons and assumptions!
PS3 to Metta: I think you mean a gusset. I thought of that but had an issue with it. The pattern has 1/2 inch vs 5/8 inch seams. I did a French seam along the sleeve seam but had to trim it down to do the 2nd stitching. That leaves an in credibly small seam to work with. I do think that getting the half inch under the arm did help and will make it wearable!!
PS4 to Nancy: I bought the fabric a couple of years ago at Treadle Yardgoods in St. Paul on Grand Avenue. As Carol Burnett (aka, Scarlett O’Hara) would say, “I saw it in the window and I couldn’t resist it!”
PS5 and Final: I did add 6×2 inch gussets to the underarm and it worked well! The buttons are sewn on – but I used snaps in lieu of buttonholes. The shirt is done. The shirt fits. It looks great! Thanks all for weighing in!!


