theraineysisters knitting and so much more

September 17, 2006

From Susan — In Response: Built In I-Cord Edge

Filed under: Knitting Tips — lv2knit @ 10:48 am

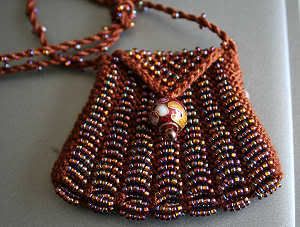
Brenda asked me how I created the nicer-looking edge on the amulet bag I made for Wendy (see next post for picture of amulet bags with standard flap). 

 amuletbag091006.jpg

It is not in the FREE basic amulet bag pattern (see upper righthand corner for link), but I’ll describe the technique here:

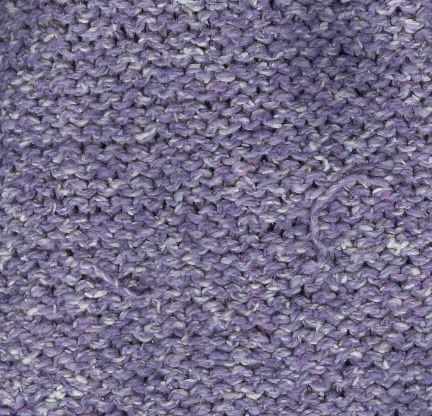
I used a built in I-cord edge.  I did not decrease the 2 sts on Row 1 of the flap.  Instead, as I knitted the flap, on every row I slipped the last 2 sts as to purl, with the yarn in front.  At the end, I knitted the 2 edge sts tog on each side to get rid of the extra sts.  It will make sense when you get to that point on the flap. 

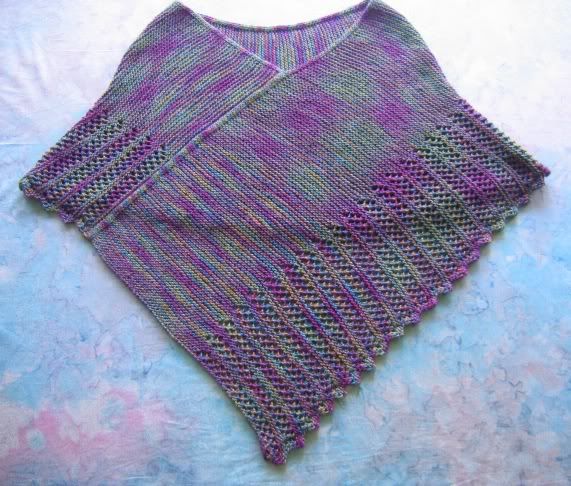
I suppose you could create built in I-cord on any knitted fabric in this way, but gauge wise it is IDEAL for garter stitch.  It is how I did the upper edge on my Ponchette, and I use it a lot when I do anything with garter stitch!!

PochetteFinished002.jpg

Thanks for your comments, Brenda!

August 23, 2006

From Sally — Fair Isle (updated to comment on a comment)

Filed under: Back Story,Knitting Tips — Sally @ 3:11 pm


July 11, 2006

From Sally — Needles (I may be in love)

Filed under: Knitting Tips — Sally @ 10:35 am

Needles are, obviously, an essential knitting tool and every knitter has his or her own needle preference. (That “his” was a shout out to you, Keith. Enjoy it.) I prefer circular needles for everything but socks; indeed, I don’t own more than a very few straight needles. The reasons why I prefer circular needles are:

1. They are more versatile. I can do circular knitting (obviously) and back-and-forth knitting with lots of stitches.
2. They work better in smaller spaces (such as cars and airplanes). I don’t get them caught on the side of a chair or feel that I’m invading someone else’s space.
3. I can’t drop and lose one.
4. The weight of the knitting stays centered on the cord, instead of being transferred from one hand to the other (which means my hands don’t get as tired).

When it comes to circular needles, my needle of choice has been Skacel Addi Turbos. They are metal — nickel plated brass, with a fairly flexible cord and a reliably smooth join. I prefer them to bamboo or wooden circular needles because they are smooth and slippery (too slippery for some yarns and some knitters, especially beginners). I’ve never had trouble using them on an airplane except on flights within Great Britain, where no knitting was allowed. The downside is cost. They’re expensive, and they’ve become increasingly expensive — especially over the last year or two. They typically cost at least $15 at your local yarn shop, although you can sometimes buy them online for under $13. I have a small fortune invested in circular needles, and I still never seem to have enough, especially since I keep so many projects on the needle at the same time.

One solution for some knitters has been the interchangeable needle sets. The most well-known of these is the Denise set. These work by giving you separate cords of varying length and needle tips that you screw together to form the needle you want. They’re great for travel and for swatching. I don’t own a set, but Susan does and I used hers to swatch and play around while we were driving to Omaha. But I wouldn’t want to knit an entire project on Denise needles. They’re just not nice enough. The cord is too stiff and the join is not smooth enough.

Well, there’s a new needle set on the market being offered by knitpicks. I just bought a set and I’m pretty impressed. Here is my quick review of their new Options needles. (Knitter’s review also did an in-depth review of these needles recently, which is how I heard of them.)

Like Addi Turbos, these needles are nickel plated brass. I bought their basic needle set, which includes one set of tips for needle sizes 4 through 11 (for completeness, you get: 4, 5, 6, 7, 8, 9, 10, 10 1/2, and 11), four cords (2 24-inch and 2 32-inch), 8 end caps, 2 cable keys (for tightening the join), and a handy needle case with six removable zip lock needle pockets. The cost is $59.99. For comparison, a set of 9 24-inch Addi Turbos in similar sizes from Patternworks sells for $144.99. (These are 9 “complete” needles with cords, which is part of the price difference, but even so it’s obviously quite a difference.) In addition to the basic needle set, I purchased 2 extra tips for size 4 and 5 needles because I use them frequently ($3.99 a pair); 4 sets of double pointed needles (sizes 0 to 3), which are made from the same hollow nickel over brass material ($3.99 a set); one size 3 32-inch circular needle ($4.99) (Knitpicks is not offering needles smaller than size 4 in their kit at this time); and extra cables — 40-inch, 47-inch, and 60-inch (you get two cables in a set for $3.99). Whew. Altogether, I spent just over $100 but I have about 18 needles for that price. Here’s a photograph of everything I got:

The first thing I noticed is that the tips of the Knitpicks needles are slightly “pointier” than those of the Addi Turbo. Here’s a side-by-side comparison. The Addi Turbo needle is above, the Knitpicks needle is below:

Finally, here is an assembled needle. I am using the 47-inch cord because my first test has been to switch to the Knitpicks needle for my feather and fan shawl.

So, what were my impressions?

1. As I was transferring the shawl to the new needle (and therefore had the old needle in my left hand and the new one in my right), the new needle felt just slightly heavier than the old ones. Now that I am knitting just with the new needle, that perception has disappeared. In other words, I don’t feel “weighted down.”

2. The new needle felt slightly stiffer. I mean the tip, not the cord. I may be hallucinating because I can’t imagine why it would feel stiffer — at first I thought perhaps the tips were slightly longer, but they’re not.

3. The needles are smooth as glass. No rough spots or burrs. I was concerned that the pointier tip might be bothersome because the way I knit, I tend to push the tip down with my index finger. It hasn’t, however, bothered me at all.

4. I had a bit of an initial scare with the join. As I was transferring stitches, I felt that the join in my right hand was perfectly smooth. But once I was using the new needle in my left hand, I couldn’t push the stitches up on that side. My heart sank. Then I realized that I had not fully screwed the tip onto the join. I had inadvertently left a gap, and the yarn was getting stuck there. Once I tightened that join, it worked like a charm. There is no catching. The yarn is gliding from cord to needle without a problem.

5. I can’t tell yet if the cord is more flexible than the cord on the Addis (which would be a plus). It is certainly no less flexible. I may not get a good feel for that until I am trying to do something trickier, such as Magic Loop knitting.

I’d definitely knit a full project with these needles unless something happens to change my mind. (And if it does, I’ll let you know.) In fact, I may never need to go out and buy needles again. I haven’t tried the size 3 “complete” needles yet, nor have I knit with the double points. My sock needles of choice are the Inox aluminum coated needles in size 0. Again, once I have a chance to use these I’ll let you all know what I think.

Bottom line: This kit is definitely worth buying if you like Addi Turbos.

June 23, 2006

From Sally — How Many Shawls Are Enough?

Filed under: Feather and Fan Shawl,Knitting Tips — Sally @ 2:26 pm

I do have a recent thing about shawls and shawl knitting. I’ve already started yet another one. My latest project is the Feather and Fan Shawl from Meg Swansen’s A Gathering of Lace. This particular pattern was designed by Eugen Beugler. Here is a photograph of the shawl as seen in the book.

As you can see, it’s a circular shawl. You start knitting it from the center out. I’ve gotten just past the point where I could transfer the knitting to a circular needle.

I hear you muttering. “What the hell is she doing knitting yet another grey shawl? Is she nuts?” Don’t answer that. In my defense, this is yarn from my stash. Well, it’s yarn that was put in my stash recently during the yarn store close out sale. It’s the same yarn used in the book, a rarity for me, and it was very inexpensive. It’s Jamieson & Smith’s laceweight yarn and it’s surprisingly nice to work with.

It’s a relatively simple pattern once you get going — when I get to the main part of the shawl, there is patterning on every fourth row only. In other words, there will be three rounds of plain knitting, which makes this a portable and relatively mindless project. I am doing a slight variation of the shawl that is described in the book without, unfortunately, a good photograph to show you. In my variation, every third patterned segment on the main part of the shawl will be an eyelet cable pattern instead of the classic feather and fan.

The only tricky part of this shawl (and this is true of any of the square or round shawls knit from the center out) is getting started. I think I must be the least dexterous person on the planet — I have trouble getting a circle started on four needles when I only have two stitches on each needle. It’s fussy and futzy and annoying. Here is my method for anyone interested.

1. Circular cast on

You don’t have to use a special circular cast on, but I have found that it looks slightly nicer at the end. So I use the famous Emily Ocker cast on method. Here is a link to what I think is a good explanation (with good photographs) of how to do it.

Circular Cast On

Casting on doesn’t solve the problem of how to start knitting in the round on double pointed needles. I’ve tried everything from trying to arrange them on a table to throwing them at the wall after they get twisted and I get frustrated. (I don’t have a problem with socks or anything else that has a fair number of stitches. The difficulty comes from having so few stitches to work with when you are starting a shawl.) I’ve also tried the knitting with two circular needles method, but found that to be a bit clumsy and awkward with so few stitches as well.

So, I use the Magic Loop method.

2. Magic Loop Knitting

Magic Loop knitting is not something you necessarily want to do a lot of, but it works really well for starting a circular or square shawl. I knit using this method until I have enough stitches (after the increases that are a normal part of the shawl pattern) that I can distribute 8-10 stitches on each needle. I meant to take some photographs of this shawl at this stage and right after the transfer to the double pointed needles, but I got caught up in the knitting and forgot. Oops. However, I did find this handy video you can watch of how to do Magic Loop Knitting. It’s very clear; if you haven’t done it before I think this video is a great reference. If you search around on this site, she has videos on other techniques as well so you may want to bookmark it.

Magic Loop Knitting

Scroll slightly down. The Magic Loop technique is listed under Small Diameter Circular Knitting (along with other techniques). All you have to do is click on the video icon and the video should start automatically.

June 14, 2006

From Sally — Another Reason to Buy Extra Yarn

Filed under: Icarus Shawl,Knitting Tips — Sally @ 8:27 pm

Just the other day, I posted about why it’s important to buy extra yarn and I gave some reasons why. Well, I have another one. Just barely into my third skein of yarn on my Icarus Shawl, I have already encountered three knots. It’s unusual in my experience for this particular yarn; I’ve knit literally thousands of yards of Rowan’s Kidsilk Haze without ever finding a knot. So, finding knots in the yarn is annoying but something easy enough to deal with except . . . After one of the knots, it wasn’t the same yarn. I’m not kidding. It changed color. The fuzzy grey, instead of being plied with grey, was wrapped around black. I pulled out a number of yards before I found another knot. At that point, the color changed back to what it was supposed to be. Say what?

That’s a new one on me.

June 10, 2006

From Sally — How Much Yarn Is Enough?

Filed under: Back Story,Knitting Tips — Sally @ 8:19 pm

Well, if you’ve seen my stash, apparently there is never enough yarn. And because the store I’ve worked at part-time for a number of years is moving to a web-based only operation, I’ve been picking up some bargains and increasing my already embarrassingly large stash.

But that’s not what I’m talking about today. I’m talking about how much yarn is enough for whatever project it is you have in mind. I thought about that today because I stopped by Ye Olde And Soon To Be No More Yarn Shoppe. It was my day off, but they were very busy and so I offered to help a couple of customers. One of them was trying to figure out how much yarn she needed for a project. She didn’t have a pattern in mind. I gave her a rough idea and advised her (especially since the yarn was 40% off) to pick up one or two extra skeins to be on the safe side. She gave me the look I give to cashiers at electronics stores who are trying to persuade me to buy the extended warranty. I felt like explaining that I don’t work on commission. But I didn’t.

The thing is — it’s cheaper to end up with an extra skein of yarn than it is to knit 90% of a garment and run out. If you are following a pattern, you are trying to match the gauge of whoever designed or test knitted it. It’s an inexact science at best. You may want to knit a gauge swatch. Was that accounted for in the yarn amount given? Probably not. Maybe your stitch gauge matches but your row gauge is tighter. If you need to knit extra rows to get the same length, you’ll use more yarn. Maybe you’ll decide to make a small change to the pattern that uses more yarn (e.g., lengthening the sleeves or changing the collar). Maybe you hold or throw your yarn differently. Maybe the designer counted wrong. Maybe there was a typo.

If you don’t have a pattern in mind, then it’s even trickier. Patterns with lots of cables or textured stitches require more yarn. Small changes in imagined style or size can greatly affect how much yardage you need to get a particular result.

I could go on and on, but I won’t. I’ll just tell you: buy extra yarn. It’s worth every penny.

May 27, 2006

From Sally — Joining New Yarn

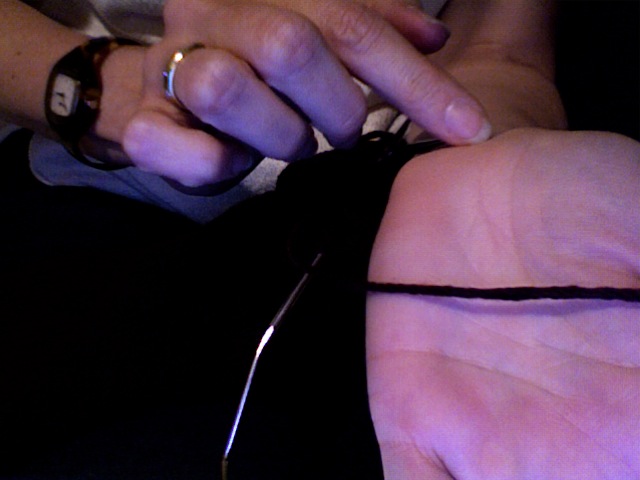
My favorite way to join yarn is with a felted splice, more commonly known as a spit splice. I am almost to the same point my sister is in the Sunrise Circle Jacket, and I need to join in a new ball of yarn. So, here is my method. Note: This method works best with 100% wool yarn (or other natural wool-like yarns such as cashmere, alpaca, etc.). It does not work with washable wools (which won’t felt), cotton, linen, etc. It does work with silk/wool blends and many other yarns. I always test whether or not this method works before I start knitting. (Forgive the funky photos; I am taking them with my built-in web cam.)

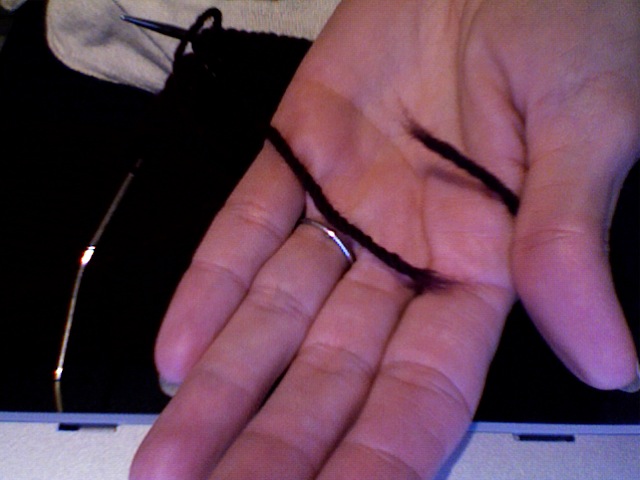
Here are two “ends” — one from the piece I am knitting, where I am running out of yarn, and the other from the new ball.

Photo 3.jpg

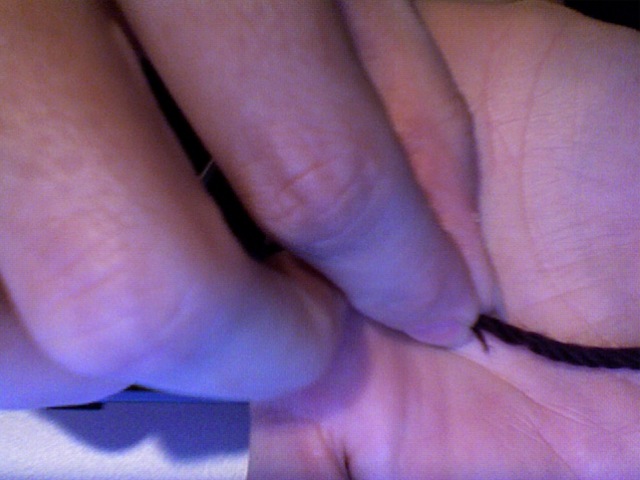
After making sure that an inch or two of each end is slightly unraveled, I moisten the end of each. I stick it in my mouth — hence the name spit splice. You can also dip each end in water. Once each end is moistened, you overlap them and twist them together slightly with your fingers.

Photo 5.jpg

Then you lay the overlapped, slightly twisted together yarn across your palm and rub your hands together vigorously. This felts the two ends together, giving you one continuous piece of yarn.

Photo 6.jpg

When I finish knitting this sweater, I won’t have any ends to weave in except for those used to seam or start a new piece.

PS – from Susan: I have used this method on non-wool yarn, but I don’t “spit and splice” I just splice.  I used it on the Summer Tweed cardigan, which is silk and whatever.  I split the yarn into half its strands and overlap them and twist them together.  I let the extra overlap fall to the back of the work.  Sometimes I trim them later, but often do not.  It also shows me where I added new yarn so I can see how much knitting I am getting per skein.  It does not work for all yarns but it is sure worth a try!

Splice

From Susan — Sunrise Circle Jacket Update

Filed under: Current Projects,Knitting Tips,Sunrise Circle Jacket,Updates — lv2knit @ 11:24 am

I am done with the left sleeve, up to the raglan shaping.  The way the pattern works, you start increasing on the left side of the raglan and create a half circle, which becomes the front.  I have been experimenting with the increases.  As some of you know, I suffer from PKD: perfectionistic knitting disorder.  I’ve got it bad!  I have never liked the way that some increases distort the adjacent sts — this happens because the yarn needed to create a new st has to come from somewhere.  This is especially true with the “m1” (m1 = make one = lift running thread between 2 sts and knit it with a twist to create a new st).  As you pull up the running thread, you pull the adjacent st tighter, making it smaller than it should be.  This can be very noticeable.  In the Sunrise Circle pattern, there are rows where you make 4 “m1’s” in a row ([k1, m1]x4).  Each st would be getting tighter and tighter trying to give up the length needed to make a new st. 

While knitting the sleeve, I tried something new.  First, I decided to place the sleeve increases along the center of the sleeve, just to add visual interest and keep with the funky look of the jacket.  I was going to use the lifted increase method because it creates less st distortion, but decided instead to use m1 as it would match the fronts — and of course I got stitch distortion.   So, I tried something different and it worked perfectly:

Sunrise Sleeve Incs

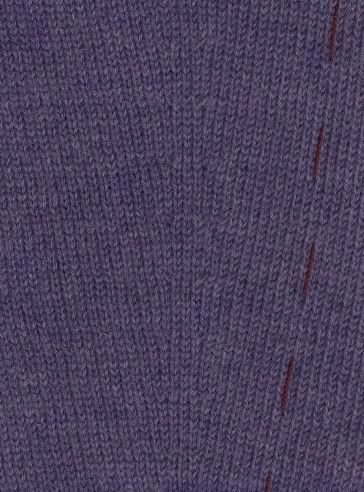
You can see there are right and left slanted m1s without st distortion.  The technique: make a yarnover (YO) on the row before the m1, in the same location as the m1 will be.  A YO is simply a way of making the running thread longer between 2 sts.  When it is knitted without a twist, it creates a new st and a decorative hole, as in lace.  However, I knitted the YOs with either a right or left twist so there is no hole.

The Sunrise Circle Jacket is asymmetrical, so for me to place the YOs in the correct position, I would need to read the pattern rows backwards on the WS rows.  Not necessary.  The right side of the jacket already reverses the shaping.  For example, when I set up for Row 3 on WS Row 2, I will read Row 3 of the right side of the jacket and substitute purl sts for knits and YOs for m1s.  Then when I knit Row 3, I will knit the YOs with either a right twist or left twist depending on the pattern.  Does this sound way too compulsive?  I thought so.  Evidence that I have PKD.  Perhaps I should adjust my meds!

May 12, 2006

From Susan — At Linda’s Request

Filed under: Knitting Tips — lv2knit @ 5:04 pm

Friend Linda asked for the link for making graph paper.  I had it in an earlier post, but here it is again for LV:  Actual Size Graph Paper.  Thanks for your comments! 

PS — this link has been added to our “Knitting Tips” page (see upper right corner of this page).

April 19, 2006

From Sally — More on Mindful Knitting

Filed under: Knitting Tips — Sally @ 12:51 pm

One of the problems in having a knitting blog I’ve realized is that readers (including, especially, my sister) can see just how many projects I have going at any one time. I can’t help it. It’s in my nature.

This winter, I’ve been of a mood to knit shawls, and I just started a new one. It’s a fairly simple lace pattern from Hand Jive Knits that will result in a long, rectangular shawl. You start it by knitting a border and then picking up the stitches for the body of the shawl from that border. When it’s long enough, you knit the other border and cast off at the same time. I am doing it in their yarn, in color Odd Duck #5 (which is how they name their variegated yarns). Here is the shawl in progress. I’ve pinned it so that you can get a better idea of how the lace will look when blocked since lace typically looks a bit shriveled and uninteresting before then. The lace pattern itself is called Dayflowers, and I first saw it in Barbara Walker’s second Treasury of Knitting Patterns.

Let me explain how this project relates to “mindful” knitting. The pattern directions only give the lace pattern in written direction form instead of in a chart, probably because the number of stitches varies from row to row. Although one can certainly chart such a pattern, it takes a bit more effort. You start with 140 stitches. The directions for the first row, which is the wrong side, say:

K3, *p15, k2; repeat from * to the last stitch, K1.

Bear with me for a tiny bit of math. I like to make sure the numbers work, which is something I almost always check before I start a pattern with repeats.

From my 140 stitches I subtract 3 (for the first three stitches because they are not part of the repeat). That gives me 137. I subtract 1 (for the last stitch, which is also not part of the repeat). That gives me 136. Each repeat has 17 stitches (the 15 you purl and the two that you knit), so I divide 136 by 17 to make sure it goes in evenly. It does! Yay! I have 8 full pattern repeats. So, when I started the shawl, I placed markers after each K2 so that I would know where my repeats started and ended; that’s especially useful for lace patterns in which the number of stitches varies depending upon the row. It’s easier to find and isolate a mistake.

So, with one row under my belt and my markers in place, I turned to the first RS row. Here is what the pattern says:

K3, *yo, K2 together, yo [K2 tog] 3 times, K2, yo, K3, yo, ssk, yo, K2; repeat from * to the last stitch, K1.

The math here works, but where I placed the markers didn’t. If you look again at the swatch, you’ll see that each pattern repeat is separated by a “ladder” of 2 stitches worth of garter stitch with a yarnover on either side. On the first WS row, I placed my marker after those 2 stitches. But, on the first RS row, the pattern also ends with those 2 knit stitches. Therefore, as I knit that row, those stitches were on the wrong side of my marker. (Have I lost all of you yet?) After a few moments of wondering if I had miscounted something, I realize what had happened and I shifted the markers 2 stitches over. In effect, that meant I was reading the first wrong side row as K1, *K2, P15; repeat from * to the last 3 stitches, K3 and making a similar adjustment on all of the wrong side rows. It’s a small thing, and it was easy to figure out by paying attention. Making that minor adjustment makes the pattern much easier to read and knit.

I’ve also started some more socks, which I’ll post pictures of later. I’ve also gone back to a sweater I started a long time ago from an absolutely stunning design. I’ll be back with photographs of that, too.

« Newer PostsOlder Posts »

Powered by WordPress