
When I made the Modular Tote, I read the directions for the bottom and could not make heads or tails out of them. It made no sense to me! But I forged ahead and figured it out. Lisa is now in the same predicament so I will share my findings with her and all of you as well. If you never knit the tote, this will be of no use to you whatsoever!
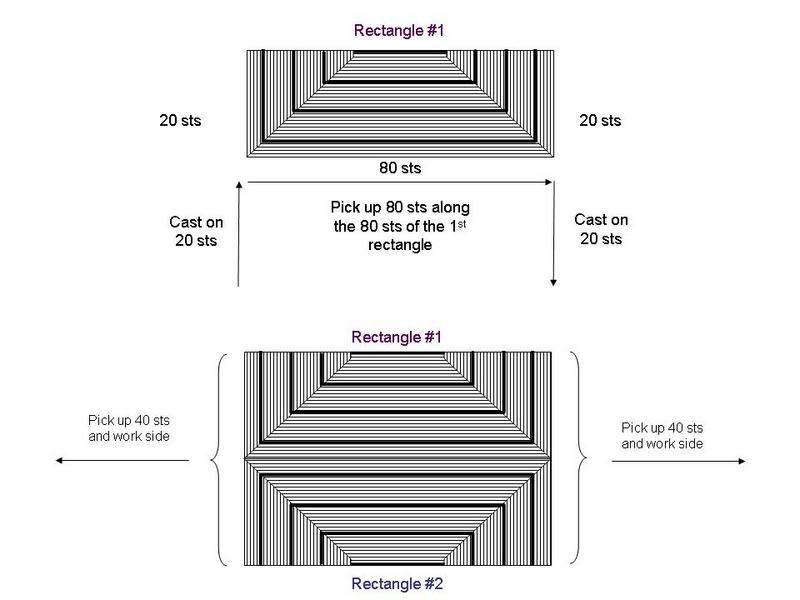
The first half of the bottom is knit and forms a mitered rectangle. You cast on 120 sts: 20 for each “side” and 80 along the bottom. As the decreases are done, a rectangle emerges. The short black bar at the top is the final 40 sts as they are bound off.Â
To create the second half of the bottom, you start by casting on 20 sts — which will end up forming a straight line with the 20 sts from the first half. Then you pick up 80 sts along the 80 sts in the center of Rectangle #1; the last 20 sts are cast on and form the second half of the line on the other side. As you knit back and forth like Rectangle #1, Rectangle #2 forms a mirror image of the first and is attached invisibly along the center of the bottom.  Because I used a provisional cast on, my 80 sts were “live” — I did not pick up, but rather released the provisional cast on and knitted the 80 sts. Â
My diagram is not to scale but hopefully it shows the construction:
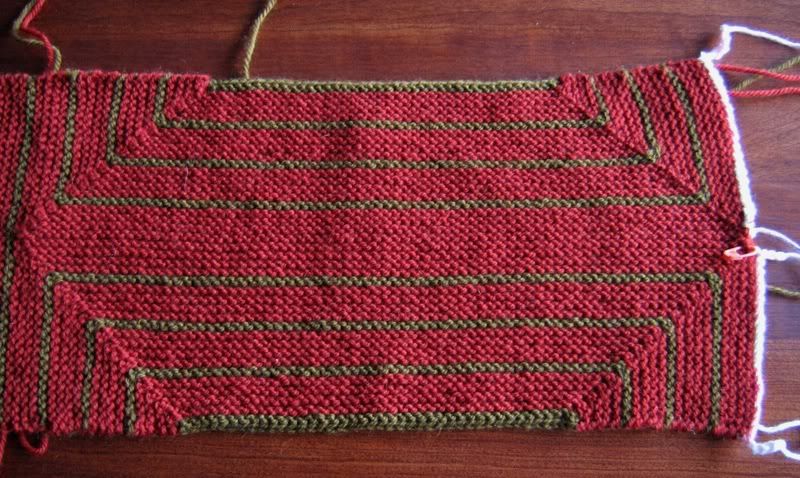
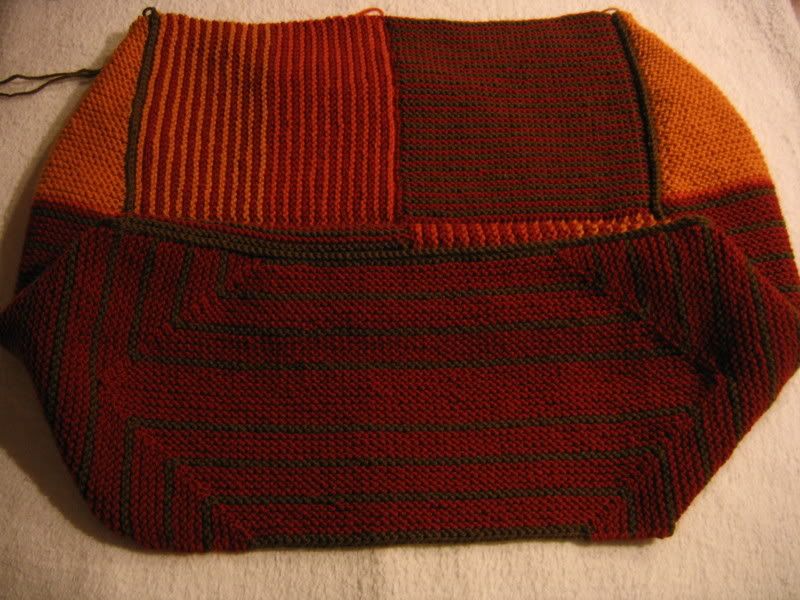
Here we see the bottom joined in real life. You can also see the provisional cast on of the two “20-stitch” sections of Rectangles 1 & 2 on the righthand side of the knitting.
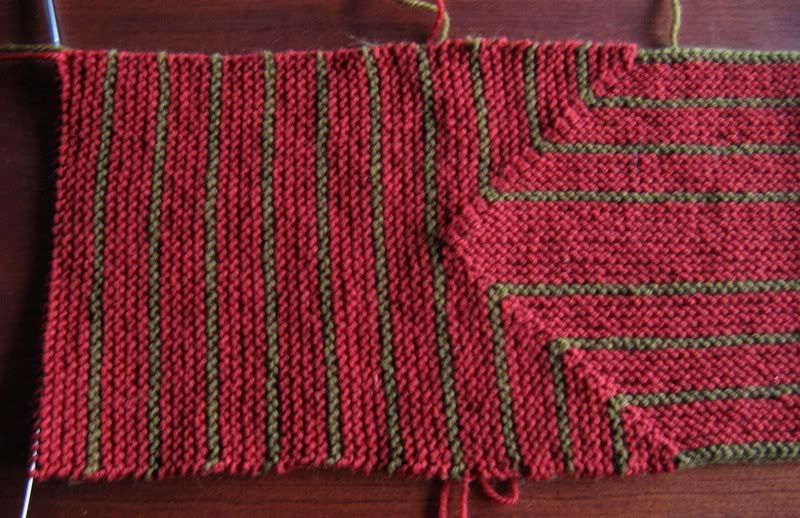
Here we see the 40 sts I picked up along the lefthand side of the bottom as they are knit to form the sides of the mitered bag.Â
After the square is knitted, you work a tringular shaped piece that tapers to the top of the bag.
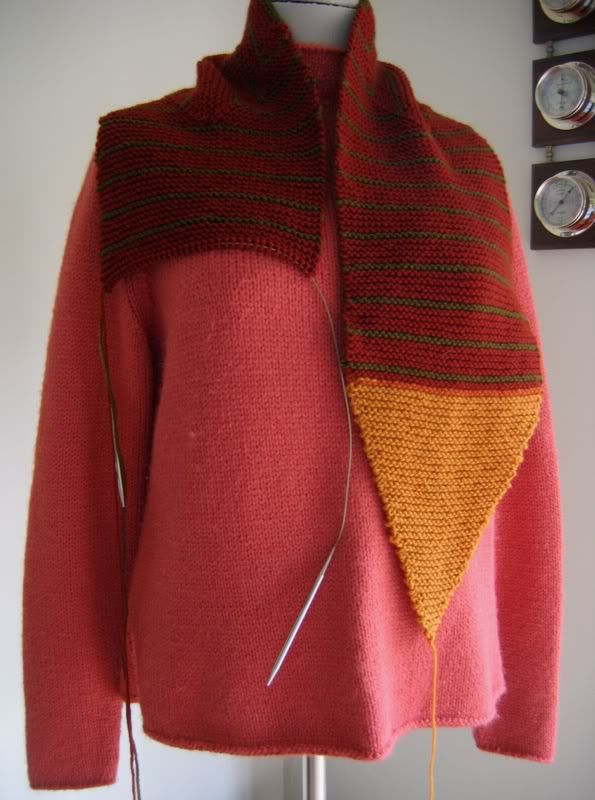
Here you see how the bottom and sides are joined to the front of the bag.
There are not really “flaps” at the top, but insets to form the sides of the bag. I hope this is helpful.Â
And, Lisa, please forgive Sally’s attempt to “help” –Â I don’t think she’s had any modular training. 😉


Susan- Sally and I are “modularly challenged”. That doesn’t make us bad people.
This may sound totally opposite of what you’ve been told- but I don’t read a pattern before
starting. Alot of things don’t make sense until you’re there, and you can feel intimidated,
when really it’s quite simple.
I also don’t read medical dictionaries or watch surgeries on TV- I develop symptoms.
Comment by Lorraine — June 4, 2007 @ 9:41 pm
Aha! Now I get it. At one point, I suspected that was the case, but then I convinced myself that the original cast on edge really did have the full 120 stitches. Now I can continue with the bag. Thank you thank you thank you.
Comment by Lisa — June 4, 2007 @ 9:59 pm
Hey! I’ve knit plenty of mitered items, e.g. Toreador Jacket, but I haven’t made or even read the Mitered Tote pattern. (Why should that stop me from giving an opinion?)
Comment by surly — June 4, 2007 @ 10:01 pm
That’s very clever to put the first and last twenty stitches on a provisional cast on.
Comment by Marina — June 5, 2007 @ 6:53 am
From Susan to Marina — Thank you! I used a provisional cast on for the full 120 sts on the first rectangle as well. I did like the fact that it was a very seamless and invisible pick up.
Comment by lv2knit — June 5, 2007 @ 8:26 am
Some one posted this blog on Ravelry as having the answer to the bottom of the bag question for this tote.
Thank you!!! I was so confused!
Comment by Christina — December 2, 2007 @ 8:14 pm