theraineysisters knitting and so much more

February 14, 2007

From Susan — Monkey Love on Valentine’s Day

Filed under: Uncategorized — lv2knit @ 1:08 am

A dear knitting friend sent me this card — two creatures in the throes of Monkey Love.

MonkeyLove.jpg

This picture is more than a little disturbing and probably illegal. 😉

I am extremely happy and relieved to announce the completion of Sleeve Numero Uno:

SleeveFinished-1.jpg

Are the rest of you as sick of this project as moi?  I’ll try to take a picture of the whole sweater in the next few days.  In the meantime, I am going to pick up the second sleeve and then pick up another project.  I will work on this at home in the evenings, but I need a break. 

Sally and I are going to start a mini-knitalong in the next few days.  I want a portable project (no, I don’t mean socks).  For me a portable project is MINDLESS knitting that does not require me to pay attention or do heavy lifting in the brain department.  Socks are knit on such tiny needles that I really need to focus to see what I am doing — remember, I have old eyes.  I want to be able to knit while I visit with friends over lunch or at my knitting group and therefore socks do not fit my definition of MINDLESS, portable knitting.  Portable, yes…

Anyway, have a great Valentine’s Day!!  Any special plans??

February 13, 2007

From Sally — A Pearl Crisis

Filed under: Sally's Berry Cluster Pullover — Sally @ 12:04 pm

I’m finished with the Berry Cluster Pullover, except for sewing on the pearls. And therein lies the problem.

I had 6 mm pearls for this project, but I’ve misplaced them. So, I went pearl shopping the other day and bought some gorgeous ones in the perfect color — but they were 8 mm. I knew they were slightly larger than I needed but they looked fine when I placed them on the sweater. The problem, though, as I try to sew them on is that because they are larger, they sit higher off the knitted fabric. As a result, I think that the thread used to sew them on may be too visible (because there is more of it that shows between the hole of the pearl and the fabric). I don’t know if I want to continue, even though they look lovely if you stand back and squint.

So, I called around to some bead shops to see who might have 6 mm ones in stock (nothing like buying three times as many pearls as necessary). Only one store seems to have any, but I’ve been warned over the phone that they aren’t perfectly round — they’re somewhat irregular. It’s snowing, and it’s going to turn into an ice storm later. So I’m sitting here wondering if I should just keep sewing beads on that I will be tempted to remove and replace, drive in bad weather to look at beads that I may end up rejecting anyway, or give up all hope of wearing this tomorrow.

From Susan — Rib It Rib It

Filed under: Oregon Cardigan — lv2knit @ 8:51 am

No, I am not ripping out, I am ribbing the sleeve!  I can’t believe I’ll get this sleeve done today.  Picture to follow!

February 11, 2007

From Susan — Can you stand another…

Filed under: Knitting Tips,Oregon Cardigan — lv2knit @ 11:02 am

…post about my &^%$##%&*&%$ Oregon sleeve?  Oh, good!

Which would you rather deal with (in terms of weaving in ends), this:

Bodyinside.jpg

or this?

Sleeveseamlineinside.jpg

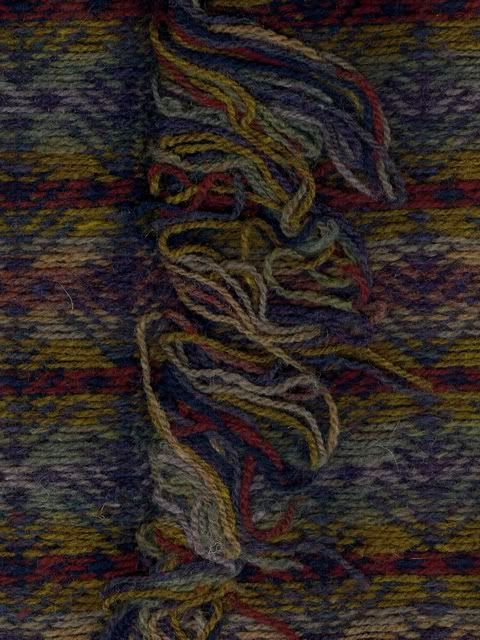
My thoughts exactly!  When you knit a fair isle cardigan, you join new colors at the center front.  The ends get cut off in the “cutting the steek” phase, so you don’t need to worry about them.  However, for pullovers and sleeves, there is no cutting so there is no trimming so the ends need to be dealt with somehow.  Some people simply tie the ends together and trim them short.  Others weave them in.  I WAS a weaver, until my last fair isle when I became a partial splicer.

With Rona I spliced the colors that had gradual changes — you can see from the picture that some changed like water colors and other color changes were very abrupt.  For abrupt changes, you can do a Russian Join, but that can be very time consuming.  I wish I had taken the time!  When I turned my sleeve inside out, it looked like the picture above — LOTS of ends!!

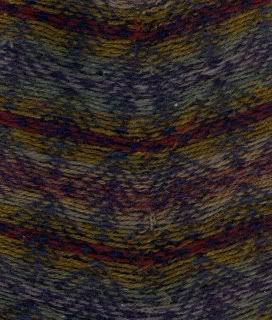
This time I am splicing every color change, even if it is somewhat abrupt.  I don’t care if the splices look like a candy cane!  I made a very conscious decision to not give a rip.  Here is what the under sleeve looks like:

Sleeveseamline001.jpg

I don’t think you can tell that the colors are spliced.  So, I am very happy now and will be REALLY happy when this puppy gets done, if that ever happens ;).  The dog hair that shows up in every picture comes free of charge.

February 10, 2007

From Susan — A Quick Tip

Filed under: Knitting Tips — lv2knit @ 1:37 pm

Sally and I have both commented on adapting patterns to gauge — most recently Sally mentioned that she needed to adapt the sleeve cap on her Berry Cluster Pullover because her row gauge was slightly different than the pattern.  We have provided a link on our blog to an on-line source for creating free Actual Size Graph Paper.  I find this very useful for regauging knitting projects.  I’m teaching a finishing class tomorrow and developed the following handout to help illustrate HOW to make these adjustments, so I thought I would share it here:

Example: Adapting a Sleeve Cap with Actual Size Graph Paper

Just thought some of you might find it useful.

February 9, 2007

From Sally — Berry Cluster Pullover Update

Filed under: Feather and Fan Shawl,Sally's Berry Cluster Pullover — surly @ 6:07 pm

It’s finished! Sort of.

Both sleeves are complete and I’ve sewn in one. But . . . I sliced the index finger of my left hand very badly yesterday. Yeah — there was a lot of blood. Kind of a crime scene look. It reminded me of that SNL skit in which Dan Aykroyd impersonates Julia Childs.

snl34.jpg

Anyway, it hurts like hell and I can’t knit very well. I didn’t feel like tackling the second sleeve or the pearls, but I’m hoping I’ll be able to get to that this weekend. In the meantime, I’m attempting to knit on my Feather and Fan shawl. But it’s slo-o-o-o-o-w. I use that finger to push the needle when I’m knitting. I can knit without it, but it feels awkward.

From Susan — A Bit of Pixie Dust

Filed under: Oregon Cardigan — lv2knit @ 12:38 am

I got lost down the rabbit hole last evening (aka websurfing) and stumbled across the cutest baby and hat I’ve ever seen.  The picture is from Cast on Cast Off (a U.K. blogger):

BabyPixieinBabyPixieHat.jpg

I mean, how cute is this lil one?

The pattern looks adorable on the above cutie and is called the  Baby Pixie Hat from Crystal Palace Yarns.  I have no one to knit this for (thank goodness)!

I have 12 inches on my sleeve: over half-way done!  Woo Hoo!

Sleeve.jpg

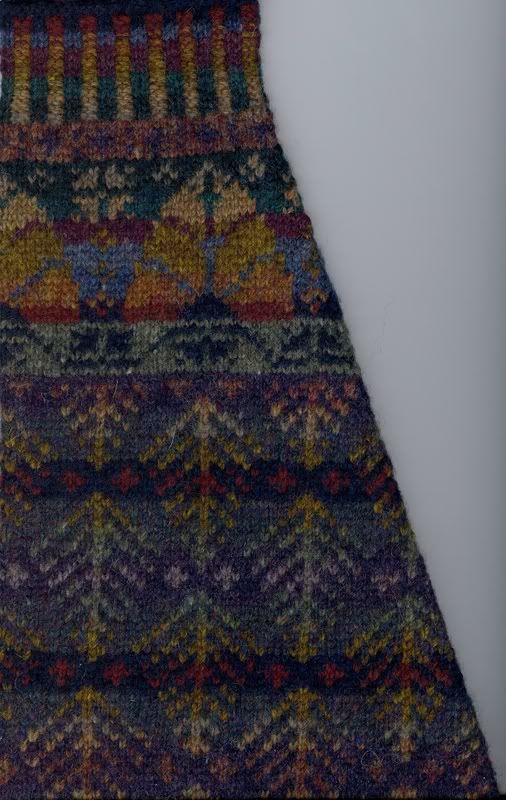
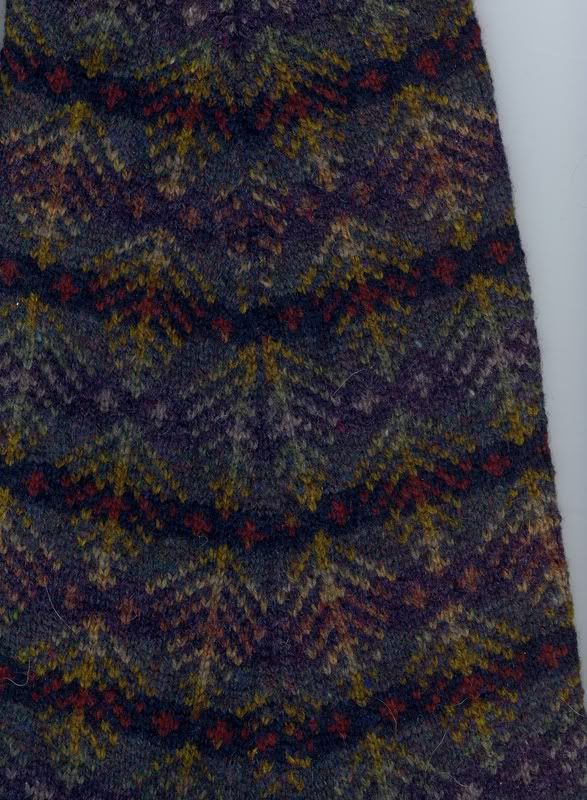
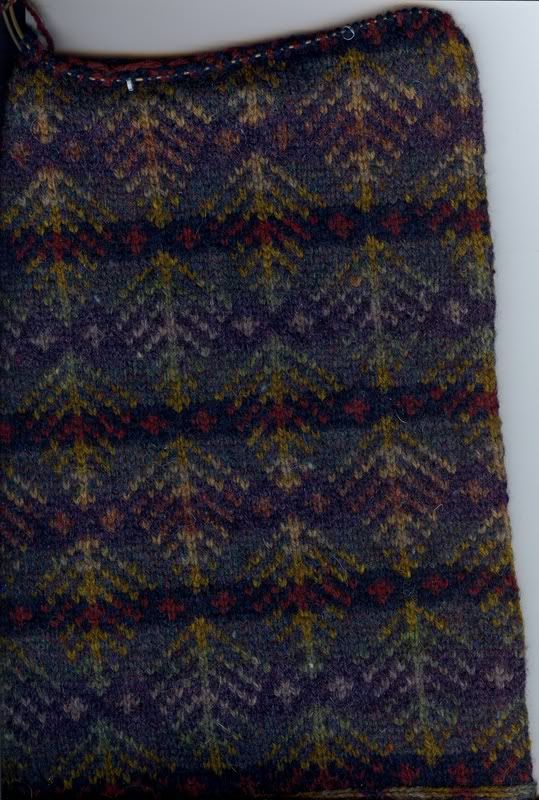
It is disconcerting to knit the pattern upside down as I cannot see the trees emerging.  I hope when I turn it around, it’s correct!

February 7, 2007

From Susan — A Brief Post about Another Post

Filed under: Great American Aran Afghan — lv2knit @ 10:02 pm

FYI
We get regular google hits from people searching out information about the Great American Aran Afghan (GAAA).  I put together the finished photo of my GAAA with individual photos and comments about each square.  The link resides in Susan’s Gallery.

February 6, 2007

From Susan — Pure Magic

Filed under: Knitting Tips,Oregon Cardigan — lv2knit @ 9:02 pm

Man, I’ve been toughin’ it out with my Oregon sleeve lately and have had some “issues” — today, issues resolved! 

I described the way I do my fair isle sleeves using the “magic loop” method.  My method has been less than magical.  You need a very soft, pliable cable to do the magic loop method.  Addis have changed their cable over the years (their timing sucks, btw) and it is now very stiff and unbendable.  For most of my fair isle knitting, I use US 3’s and have them coming out of my whazzoo (sp?).  However, A*St*rm*re yarn is heavier and so I am using a US 4.  All my US 4 needles have the stiff cable except my 47″.  That is just WAY too much cable to deal with!  I have been on a quest at my LYS’s to find a better needle and finally found an older Turbo with the old, softer/thinner cable.  I could probably have ordered needles from KnitPicks, but thought I would shop around first.  I know that Inox has some (out of production) and Susan Bates (not in the size or type I needed), so I hunted.  The difference with the new needle is truly amazing and is making my knitting SO much easier!!

MAGIC LOOP
I know many of you know this technique, but a couple of readers asked for details.  Here is the single loop method:
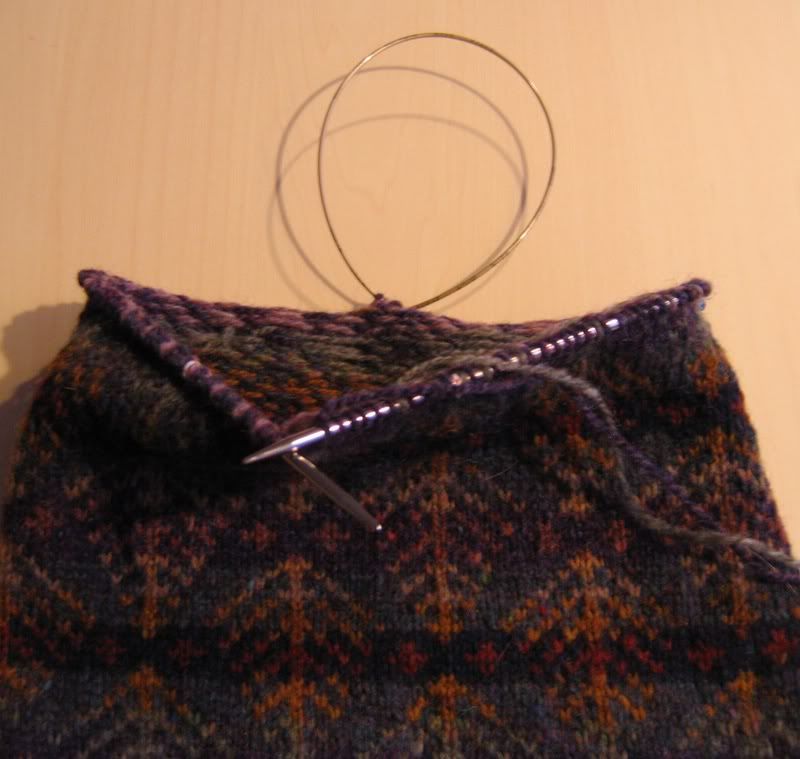
OregonSleeve001.jpg

I simply pull the excess cable length between two sts about halfway around from where I am.  I knit to the loop and then pull the excess out half way around again, etc.  When the sleeve gets too small for the needle tips to feel comfortable, I switch to a modified double loop.  In standard magic loop, you pull out the RH needle, form a loop, and then knit across the cable:
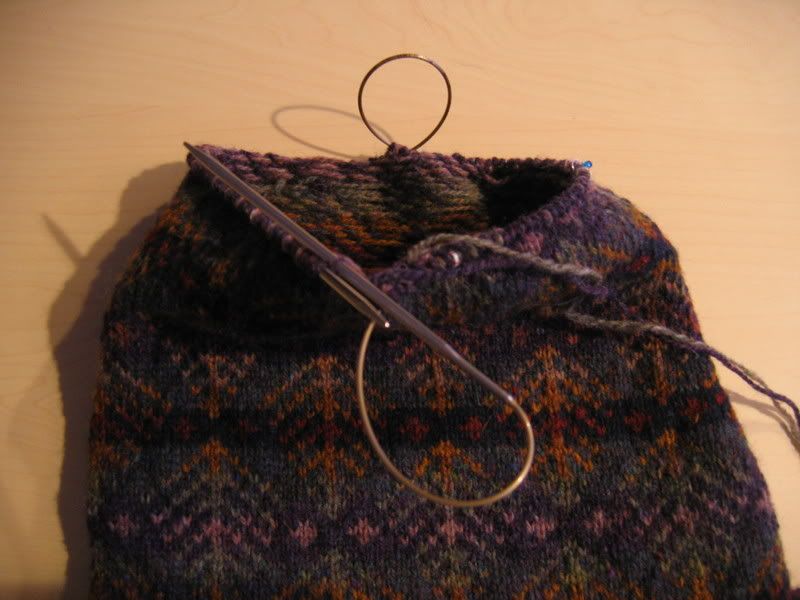
OregonSleeve002.jpg

I don’t care to strand (or plain knit for that matter) across the cable.  It is difficult to maintain stitch size and just feels WRONG.  My modification is to pull the second loop out a few sts back on the RH needle.  Therefore you are always knitting and stranding across the regular needle tip:
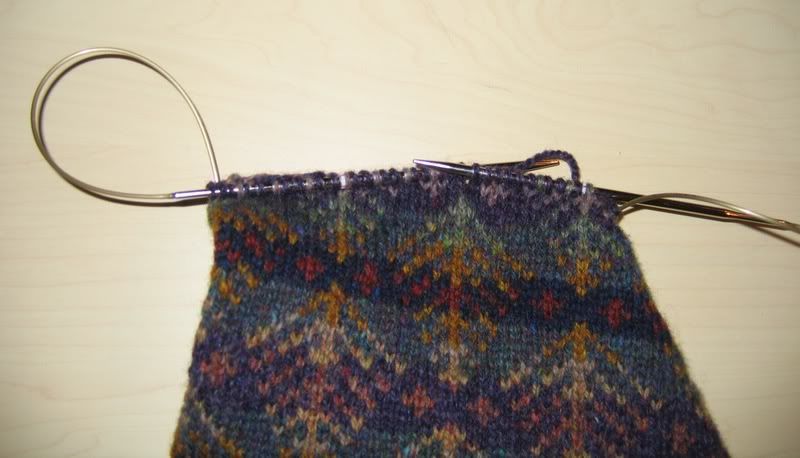
OregonSleeve009.jpg

This picture shows how it looks when the sleeve gets very small, toward the cuff (I’m not there yet!).  You continue to knit on a long-tipped needle (unlike a 12″ circular with itty-bitty, short tips), you get the benefit of the magic loop AND you strand across a regular needle (not a dpn).  When I get to the first loop, the other loop is already positioned about halfway around, so I pull the second one a few sts back from the RH tip.  I keep going in this way for the whole sleeve.  I hope this makes sense and is not too technical and boring ;). 

I will use the 32″ ‘ for the entire sleeve since they did not have a 24″ with the thinner cable.  I am on a roll, my knitting peeps!

February 4, 2007

From Sally — Berry Cluster Pullover Update

Filed under: Knitting Tips,Sally's Berry Cluster Pullover — Sally @ 12:55 pm

Am I the only one who gets bored at the start of the second sleeve? That’s where I am on the Berry Cluster pullover. I was hoping to be at the “sewing pearls on the clusters” stage of the sweater today, but I am not. Part of the problem, besides the fact that I am a slow knitter, is that I needed to pick up the neck three times and knit it twice.

The directions have you pick up about 90 stitches around the neck, which means that you can’t leave live stitches on the back and front necks because you would have far too many stitches. I picked up the neck as instructed, knit a few rows, and didn’t like how it looked. It was too obvious where stitches were skipped on the pick up. (I don’t have a photo of this.) I think it probably works fine if you use the fuzzier yarn called for in the pattern, but with my very smooth yarn there was nothing to hide the pick up.

On attempt number two, I went ahead and picked up into every stitch on the front neck. The pick up looked much better, but I knew there would be too many stitches and the neck would be too wide. I tried to compensate for that by having a series of decreases at four places around the neck (evenly distributed with respect to the shoulder). The neck looked fine, but it was still too wide at the very top.

I had two main options at that point. The first option was to start again with the higher number of stitches, but do more decreasing. I realized that to make the decreasing work, I wouldn’t be able to restrict the placement of the decreases the way I had on this attempt. I was afraid that decreasing at even intervals all around the neck wouldn’t look very nice and I decided I was too lazy to figure out a decorative decrease placement. The second choice was to pick up the specified number of stitches, but find a way to hide the pick up. So, I did the pick up again and then immediately did a purl row.

I think that worked fairly well.

A side note re the sleeve cap:

Because I am using a finer yarn than called for, my row gauge is “off.” Instead of 28 rows per 4 inches, I am getting closer to 31 or so. That’s not a problem for the most part because the pattern gives most of the directions in inches (e.g., 8 inches for the armhole). However, on the cap directions for the fitted sleeve, the directions are given for a set number of rows. If I followed the directions exactly, I would have had 55 rows total in the sleeve cap, which would be the 8 inches needed if my row gauge was correct. However, I knew that I had knit 64 rows from the first armhole decrease to the shoulder. With 55 rows, my cap would have been too short. Knowing that in advance, I slipped in a few extra rows here and there so that I had a total of 62 rows. I basted the sleeve into the sweater to make sure the sleeve length was right and the cap fit perfectly. Because fitted sleeves can be tricky, I think it always pays to look carefully at the directions for both the sleeve and the body to make sure that you compensate for any gauge issues.

Oh! I was going to save the yarn I used for my first neck attempt and use it for sewing. I’m not going to now. Here’s why:

(This is Eightball, a Chihuahua puppy who visits us occasionally and apparently can tell the expensive yarn from the cheap stuff.)

« Newer PostsOlder Posts »

Powered by WordPress