theraineysisters knitting and so much more

August 9, 2007

From Sally — Silver Belle, Silver Belle

Filed under: Silver Belle — surly @ 4:20 pm

This is a quickie post from the airport in Charlotte, NC before I step out into the lovely 100+ degree weather.

I am almost finished with the peplum on my Debbie Bliss Silver Belle from the new Vogue. (Mine, of course, is pink not silver.) Here’s a quick photo from this morning:

Here is another shot. On the peplum, you can see the two lovely shawl pins from Romi. Aren’t they gorgeous? I can’t wait to use them.

From Susan: The pins are gorgeous, and I’m quite envious!  I really love the pink peplum.  I was hoping I wouldn’t because my knitting queue is so l-l-l-o-o-o-n-n-n-g-g-g!! 🙂

August 7, 2007

From Susan — Peas Porridge Getting Even older!

Filed under: Back Story — lv2knit @ 10:27 pm

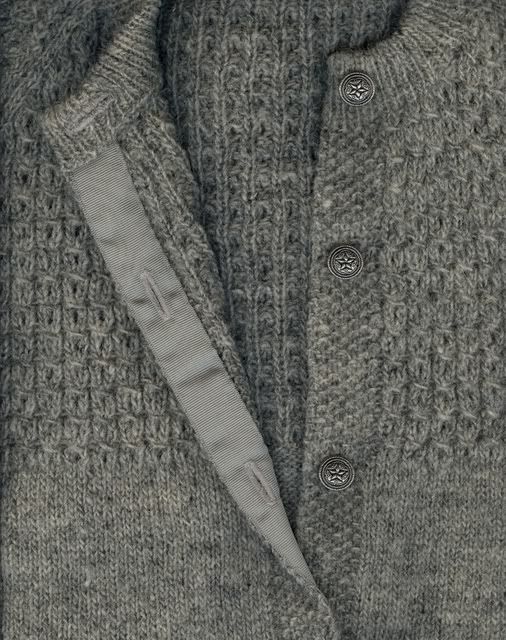
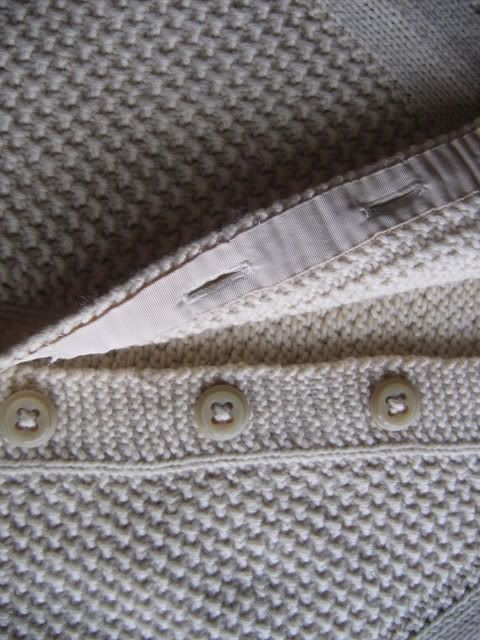
A few of you were asking about the machine made buttonholes on the sweater my mom made.  My first buttonholes were done in the same way: like mother, like daughter, or some such thing.  It made sense to me and actually they turned out okay.  I’m not sure what purists think of this approach!

I made this sweater at least 25-30 years ago.  A co-worker of mine was knitting this Penny Straker design — which is still available – and I couldn’t believe I had found another knitter.  I made the identical sweater because I am so darned imaginative.  To be honest, in those days we didn’t have knitting magazines with fabulous designs arriving at our doorstep.  You had to go to a knitting shop and search through patterns.  It made it much easier to just knit the same thing she was making.  One thing I do remember is that she did not make buttonholes at all.  Her front band was knitted so loosely that she just shoved the buttons through any-old-where.  I think that is one reason I used this BH method — to make sure I HAD buttonholes. 

PennyStraker002.jpg picture by lv2knit

Here is a close up of the buttonholes:

PennyStraker.jpg picture by lv2knit

And the inside showing the grosgrain ribbon:

PennyStraker001.jpg picture by lv2knit

I still use grosgrain ocassionally on the button side of the front bands for support.  Now I tend to use the one-row bound buttonhole or the very simple k2tog, YO buttonhole, but I do think the sewn method has its place.

The main problem with this sweater was that the sleeves were INCHES too long.  I did not know how to calculate the sleeve length for a raglan sleeve — and my sweater had very deep armholes, which of course added length.  The sweater is way too small for me now anyway! 🙁


August 6, 2007

From Susan — Peas Porridge in the Pot Nine Days Old

Filed under: Back Story — lv2knit @ 10:25 pm

Am I the only one who feels like summer is so fast paced it is hard to catch your breath?  I am on a whirlwind, let me tell ya!  And knitting is not even a part of it!

Hubby has been working a lot of OT, which puts me into “single parent” territory (a sympathetic shout out to all of you who handle this full time — I will try not to whine ;)).  Knitting takes a back seat when you are driving!

So, I am going to pull out past projects at the suggestion of Marina.  I have nothing new to share, but can’t let the weight of the B::L::O::G fall solely on Surly’s delicate but capable shoulders.

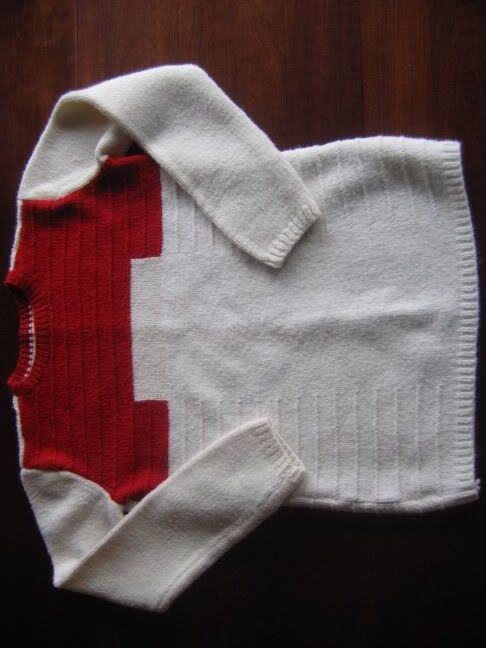
Here is the first sweater I ever made.  I took this walk down memory lane way back in the early days of our blog, but most of you probably missed our early posts.  Please don’t hate me for serving up re-heated blog.

Firstsweater.jpg My First Sweater picture by lv2knit

There are so many things wrong with this sweater that’s it’s hard to list them all.  Let’s just say that “buy enough yarn in the same dye lot to complete your project” was advice that fell on deaf and inexperienced ears.  Who knew 100% acrylic was so “dye-lot sensitive?”

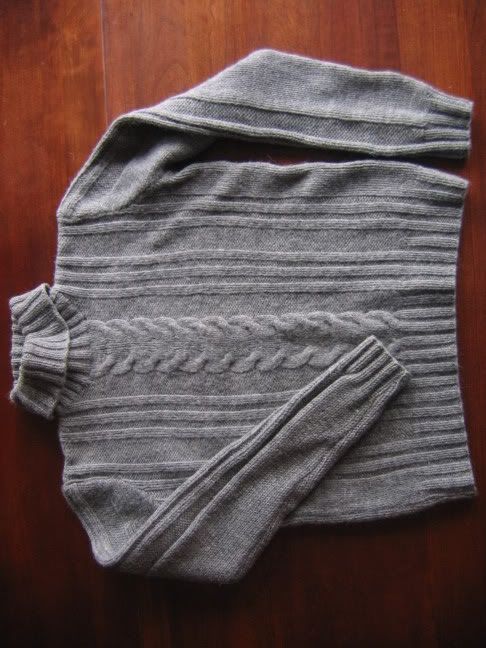
I wore this sweater constantly in college:

GrayTurtleneck.jpg Gray Turtleneck picture by lv2knit

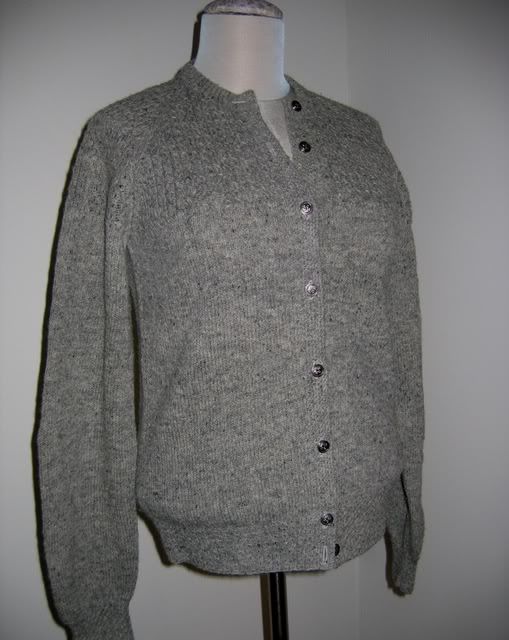
I was such a little seamstress back then that I used a sewing machine to whip this puppy together (no, I’m not kidding!).   This was my first cable experience and at the end of it I was convinced that I knew everything there was to know about knitting.  Period.  I was a total expert — oh, brother!  “Do not wash wool in the washing machine as felting will occur” was additional advice that seemed to go right over my head!

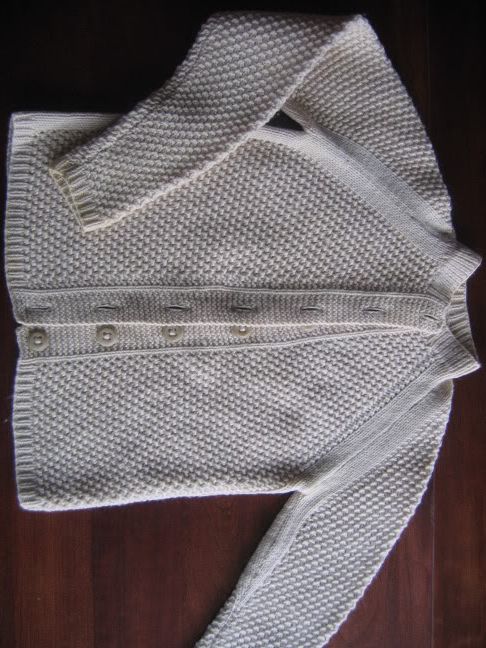
My mom made this sweater for me in 6th grade.  I absolutely love it:

6thGradesweater.jpg Sixth Grade Sweater picture by lv2knit

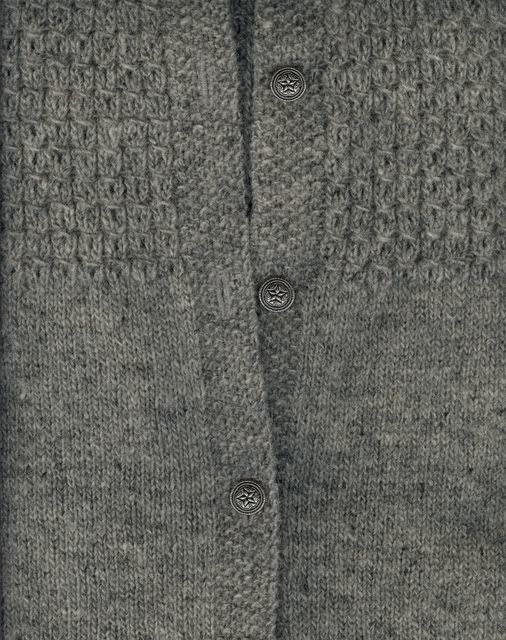
I like to try and figure out stitch patterns when I encounter something unusual, but I have not been able to decipher this one. 

And just look at the buttonholes — hey, maybe this is why I thought you could use a sewing machine to put knitted garments together!

6thGrButtonDetail.jpg 6th gr Button Detail picture by lv2knit

So Sally and I were exposed to very lovely knitting at an early age.  It seemed like a very normal past-time.  We both started out by knitting sweaters — no scarves, hats or mittens — though of course we branched out along the way.  To this day, I prefer sweaters to all other knitting, and I think that is true of Sally as well (though she did go through that lengthy “shawl phase”).

I hope to get back on the knitting horse again soon — I need my fix! 😉


August 4, 2007

From Sally — In the Pink

Filed under: Silver Belle — surly @ 4:36 pm

I like pink yarn and I cannot lie
You other knitters can’t deny

(Sorry. I’ve been watching too many concert videos.)

But it’s true. I love pink yarn and I buy a lot of it. I pulled together some of the pinks from my stash just to show you.

Sadly, that is not all of the pink yarn in my stash; it’s just what was most easily accessible. Although I included in that photograph my Cap Shawl and my “pink pouf,” the truth is that I tend to mostly collect pink yarn but I hardly ever knit it. For some reason I get very particular about patterns for pink yarn. I have no idea why.

Anyway, I received my 25th Anniversary Vogue in the mail the other day and found the perfect pattern to use up my 18 skeins of pale pink Cashmerino Aran. (Quick aside: my mailed copy of the magazine was defective. Halfway through, the ink started to fade away. At first I thought it was purposeful: the issue did have a silver/gray them. When the ink completely disappeared, I realized I had a problem. It’s a great issue, though, so I went out and bought a second one.)

I am knitting Silver Belle designed by Debbie Bliss, one of the “cover” sweaters whose pattern is downloadable as a PDF. Here’s what it looks like:

It’s a bit of slow go at the beginning. The size medium, which I’m knitting, starts out with over 400 stitches in the peplum. There are a few especially slow rows, where I have 40+ cables to cross. At my sister’s suggestion, I am cabling without a cable needle, which does speed things up. (For a great explanation of how to do that, including helpful photographs, visit Wendy Knits. I could explain it in my own words, but why bother when someone else has already done such a great job?)

Here’s where I am on my Silver Belle:

In one of those rare stash miracles, I even have the perfect buttons for it (there is a perfect pink color match in real life in the mother of pearl that isn’t quite captured by the camera):

August 3, 2007

From Susan — Our Friends to the North Pull Through

Filed under: Susan's Kauni Cardigan — lv2knit @ 1:34 pm

It has been difficult for people interested in the Kauni Cardigan to obtain the yarn.  A Canadian shop called Fun Knits is now stocking the yarn in its new put up.  Check it out!  You don’t have to use the Rainbow Kauni — there are other colors to choose from. 

PS:  Margaret shared this information about another source for the Kauni Yarn:

“If anyone in the US is interested in a little more instant gratification wrt the Kauni, the same put-ups arrived today at Knitty City in NYC upper west side Manhattan www.knittycity.com – contact Pearl Chin the owner pearlATknittycityDOTcom if you need it with a touch less shipping costs, or if you actually live within driving distance of the shop.”

Thanks, M!!!

From Susan — A Dam Site for Sore Eyes

Filed under: Back Story — lv2knit @ 8:43 am

Thanks to everyone for the heartfelt words.  I really appreciate the outpouring of kindness for our community.  I do not plan on dwelling on this incident, but thought I would share a few pictures before moving on.

A view from the dam:

35WBridgefromDam8-02-07003.jpg picture by lv2knit

The road leading into the lock:

35WBridgefromDam8-02-07009.jpg picture by lv2knit

The other side of the river:

35WBridgefromDam8-02-07001.jpg picture by lv2knit

Now we will move to the healing phase.

August 2, 2007

From Susan — My Minnesota Heart is Breaking

Filed under: Back Story — lv2knit @ 3:06 pm

I know all of you have heard about the horrific incident yesterday in Minneapolis.  The bridge in question is familiar to everyone in the city and is very familiar to my husband.  When it collapsed, it collapsed right at his place of work.  You may remember when I spoke of the Karabella Kruise that my DH works on a lock and dam.  It is the dam that is shown in all of the news reports.  The security video that is being shown was taken at the dam.  He was not at work when the incident occurred, but did go in to see if he could help and does work tonight.  The bridge landed on the road into the lock site and debris is blocking the lock chamber — blocking the entire river actually.  It is a terrible scene and is still actively playing out. 

This event will be remembered for years to come — where were you when … ?  We are asking ourselves: What would I have done?  How would I have fared?  Everyone is thinking, “It could have been me.” 

All of my family members are fine, but many people still await news of their loved ones.  Emergency crews have seen people in the cars that are trapped underwater and cannot recover them due to debris and the river current.  It is extremely dangerous to do any underwater work near the dams under the best of conditions. 

We are shocked, we are saddened, and we are appreciative of the outpouring of sympathy that has been sent our way.  Thank you for your kind thoughts.


August 1, 2007

From Susan — Marooned on Sleeve Island

Filed under: Susan's Kauni Cardigan — lv2knit @ 1:04 pm

I started one of the Kauni sleeves a few days a go, but just can’t seem to get with it.  Part of the slow-mo stems from the fact that I am having some pain in my right wrist — repetitive motion injury. 

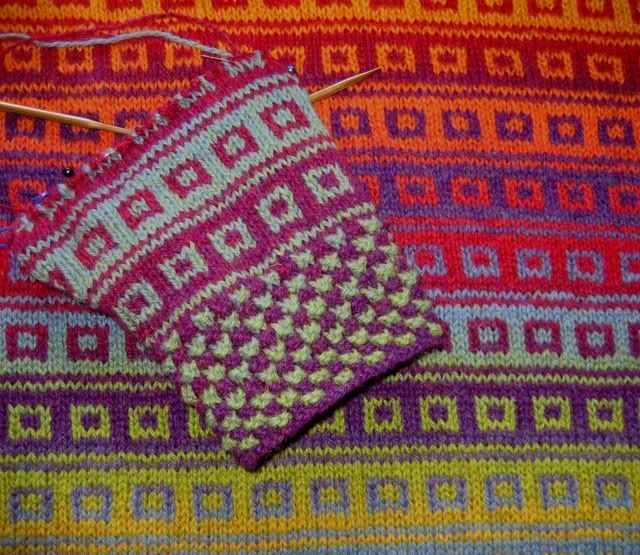
The other part of the lack of speed is that I’m not in love with where I started the colors on the sleeve.  I did it on purpose to position most of the sleeve in my favorite color zone.  However, I think the blue-green/purple is not as attractive as other combinations.  I have decided to keep going to see how it evolves, but may start over at some point.  Then again, does it matter?  I know that Stephanie the Yarn Harlot has decided to make both her sleeves identical.  I kind of like the way the sweater looks when they do not match, so I am not going to do that.

Sleeve8-1-07002.jpg picture by lv2knit

I knitted the garter stitch cuff back and forth and then joined it with a seam to knit the stockinette in the round.  It was much easier that way.

Just a little shout out to Surly: what a fantastic job on the fair isle blanket.  I love the colors and the design — and she did an incredible job.  And she did a very nice job showing the cutting and finishing of the steeks.  I came up with the crocheted edge technique when I made my first fair isle years ago (Rambling Rose by A. St*rmore).  I had seen the “x” method on several sweaters and was not pleased with the result.  I am not a crocheter but thought a crocheted “casing” for the cut edge would work well and have used it ever since. 

I am hoping that if I bind my wrist I’ll be able to do some knitting.  I need to knit every day or I go a little ::c::r::a::z::y:: ;)!

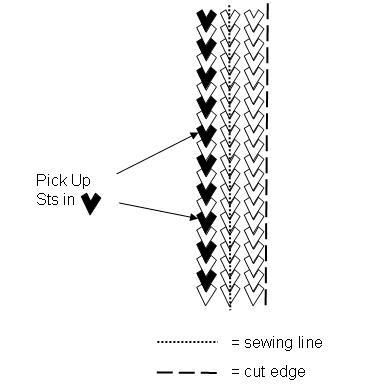
PS — Tamara asked about where to insert the crochet hook when using the crocheted edging that Sally described.  I do not get real hung up on hitting every other stitch, but this is generally what I do:

CrochetEdge.jpg picture by lv2knit

And, Tamara, just take the plunge!  Cutting is better than not cutting — if you don’t cut, you don’t finish!  I love cutting my sweaters — but only the fair isles!!

PS2: I bought a wrist splint so I hope that helps.

PS3 to Carol: I do my own diagrams.  I use PowerPoint to make the diagrams (sometimes with a photograph) and then save the slide as a jpeg.  It allows me to add text and arrows etc. to a picture or create a diagram from scratch.  “How much Shawl Have I Knitted?” is an example, as well as the bottom of the Modular Tote from the June 4th post.  The jpeg picture does not always turn out as well as the original slide but the point gets across.  I use PowerPoint a lot in my regular job and find it very versatile, though I’m sure there is drawing software out there that is better.  For my limited needs, PowerPoint works well.

July 30, 2007

From Sally — Finishing Steeks

Filed under: Knitting Tips,Widdicombe Fair — surly @ 3:31 pm

My baby blanket, Widdicombe Fair, is finished. Baby X has not yet made his way into the world and so I can now tell my husband “I told you so.” (He was a bit nervous about my finishing this in time.) I have a few in-progress photos to show you before I get briefly into steek finishing. There is no video, alas, because my videographer was on her way to Colorado before I got to that point. (More on that later.)

Here is the blanket as I finished the last row before binding off. I’m including this just to show how it makes a nice little corner even on the needles.

Instead of a regular bind off, I did a two-stitch I-cord bind off. It gives a little more firmness to the edge and makes a nice miniature welt that matches the garter stitch in my opinion. While working on it, I had a bit of help from my assistant. If you look carefully, you can see his favorite toy — a chewed up rattan coaster — tucked up into the knitting in the upper left-hand corner.

Here is a close up of the border with the I-cord bind off.

I know you all want to see how I finished the steek, which is kind of embarrassing actually. I’m not the expert finisher that my sister is. Moreover, I had a lot of trouble taking photographs of what I was doing with one hand while still trying to do something with the other. So please take a moment to lower your expectations and then we may proceed.

First of all, steeks are wonderful things. They do add a tiny bit of bulk or thickness; that’s usually not a problem but just something to keep in mind. I think the yarn from Virtual Yarns is a bit heavier than other fair isle weight yarns, and so there is a bit more thickness to my blanket steeks than there are with some of the fair isle garments I’ve knitted. I try to keep that in mind when I figure out what I’m going to do with the finished product.

There are a lot of different ways to finish steeks. Truth be told, if they are not going to show you probably don’t have to finish them at all. (This only applies, of course, to items knitted out of Shetland wool which sticks to itself.) For example, I never bothered to finish off the armhole steeks to a child’s sweater I knitted at least ten years ago. My son wore it and then my niece. The steeks are still fine. They haven’t unraveled. Nothing was done to these steeks — no hand or machine knitting of any kind.

The traditional way I learned to finish steeks is the cross-stitch method. After you cut the steek, you trim it down to two stitches or so and then trap the raw steek edges with Xs of yarn. I did that when I first started out with fair isle. Here is what it looks like. *Covers eyes in embarrassment.*

Maybe it’s just my crappy technique, but I’ve never thought this method looks all that great. Its advantage is that it is really simple and requires absolutely no machine sewing.

I’ve now switched to doing a crocheted edge along the steek because it makes it flatter (thus reducing that little bit of bulk) and I think it looks more finished.

I know of two ways to do a crocheted edge to finish a steek. One way is to crochet on either side of the center stitch of the steek before you cut it. To be able to do that, the center of the steek has to be stable enough to “hold” the crocheting and therefore it’s recommended that you spit splice your color changes instead of just adding in new yarn. (I think you could do a variation on this in which you do the crocheting close to the edge stitch on each side and then cut but I’ve been afraid to try it.) To me, doing all that spit splicing at the center of your steek sort of ruins the benefit of the steek. As a result, I’ve never tried this method. I suppose it would always work at the armhole steeks of a cardigan because you don’t use those steeks to change color. It would also work if you were only using two colors. (Examples: Jade Starmore’s Persian Tiles or the Kauni Cardigan.) If you are interested in a better explanation of this method, it’s described in great details with lots of photographs on Eunny Jang’s blog here.

The method I use requires a sewing machine. You don’t need to machine stitch the steek to keep it from unraveling — the reason you do it is to stabilize the edge so that you can crochet along it. Here is where the bad photographs start. I don’t do anything to the cut edges of the steek until I have finished the border. As that child’s cardigan demonstrates, those steek stitches are perfectly happy to just sit there. Once the border is finished, I sew a line of stitches between the edge stitch and the cut edge. I use the edge stitch, which has folded in nicely, as a guide for stitching. I try to stitch through the middle of the third stitch from the edge stitch. You could do it closer to the edge, especially if you are a better seamstress than I am. You want to make sure you don’t sew through anything but the steek. Susan could probably give some great tips here; I just muddle through.

Once I stitched the steek, I trimmed it close to the stitch line.

Then I began to crochet along the edge, inserting the crochet hook into the middle of the second stitch from the edge stitch. (That is, I did that except in those places where my sewing line wasn’t as straight as I would have liked.)

A close up of the crocheted edge:

Close up of the crocheted edge of one my sweaters:

For a blanket, it would probably also look nice to knit a facing to cover the steek (although you would have more bulk) or cover the steek with a matching gros grain ribbon. I didn’t do that because I’m lazy. Here is the baby blanket blocking.

For those persistent few still reading, here it is off the blocking wires:

Sadly, my little assistant who so loved this blanket, is gone. He and my daughter left yesterday for Colorado. I cried like a baby when they left.

She’s happy; that’s what counts. (She may not be as happy when she sees I posted her picture.)

July 28, 2007

From Susan — Kissin’ Kaunis

Filed under: Susan's Kauni Cardigan — lv2knit @ 7:51 pm

As luck would have it, Kim’s Kauni invited my Kauni to koffee.  Kim and I had to drive them so we had coffee, too.  I took a picture of the Kissin’ Kaunis side by side (mine is on the left, Kim’s on the right):

KauniKouzins003.jpg picture by lv2knit

You might be saying to yourself, “Hmmmmm.  What is all the hoo ha about?”  I’m not sure.  They look different.  They certainly look different in real life.  But row for row they aren’t crazy different.

Feel free not to vote for your favorite (our Kaunis are very sensitive), but I thought I would share their klose encounter of the Kauni kind.

« Newer PostsOlder Posts »

Powered by WordPress