theraineysisters knitting and so much more

June 4, 2007

From Susan — In Response to Lisa

Filed under: Uncategorized — lv2knit @ 9:31 pm

When I made the Modular Tote, I read the directions for the bottom and could not make heads or tails out of them.  It made no sense to me!  But I forged ahead and figured it out.  Lisa is now in the same predicament so I will share my findings with her and all of you as well.  If you never knit the tote, this will be of no use to you whatsoever!

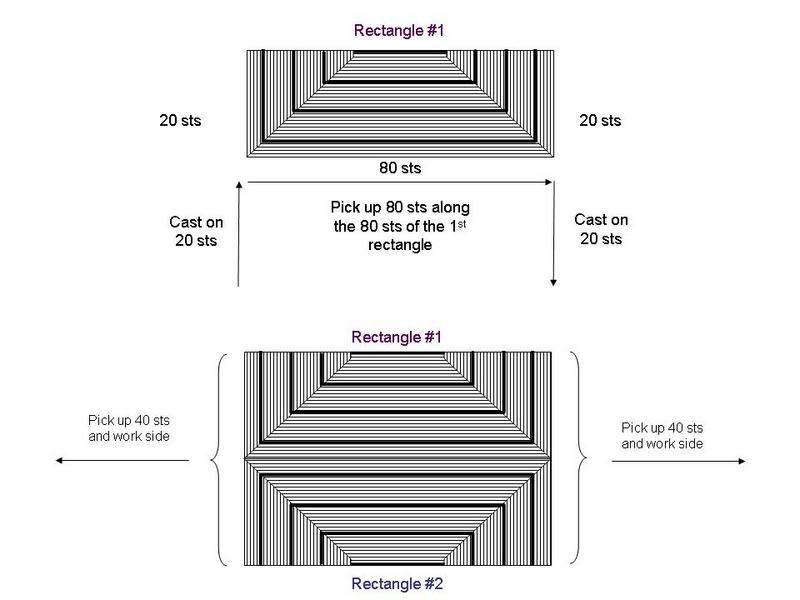
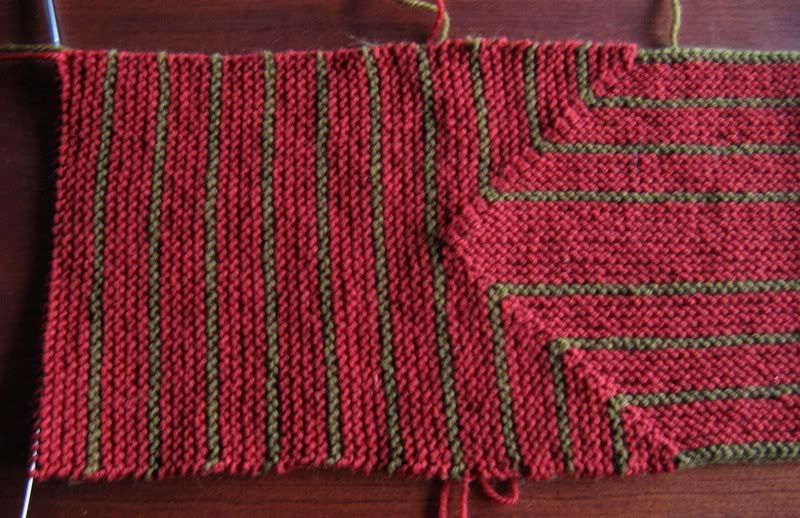
The first half of the bottom is knit and forms a mitered rectangle.  You cast on 120 sts: 20 for each “side” and 80 along the bottom.  As the decreases are done, a rectangle emerges.  The short black bar at the top is the final 40 sts as they are bound off. 

To create the second half of the bottom, you start by casting on 20 sts — which will end up forming a straight line with the 20 sts from the first half.  Then you pick up 80 sts along the 80 sts in the center of Rectangle #1; the last 20 sts are cast on and form the second half of the line on the other side.  As you knit back and forth like Rectangle #1, Rectangle #2 forms a mirror image of the first and is attached invisibly along the center of the bottom.  Because I used a provisional cast on, my 80 sts were “live” — I did not pick up, but rather released the provisional cast on and knitted the 80 sts.  

My diagram is not to scale but hopefully it shows the construction:

Diagram.jpg

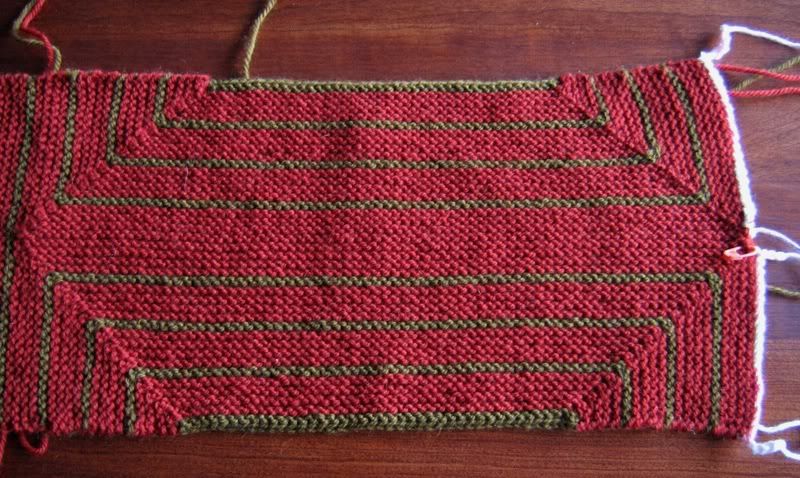
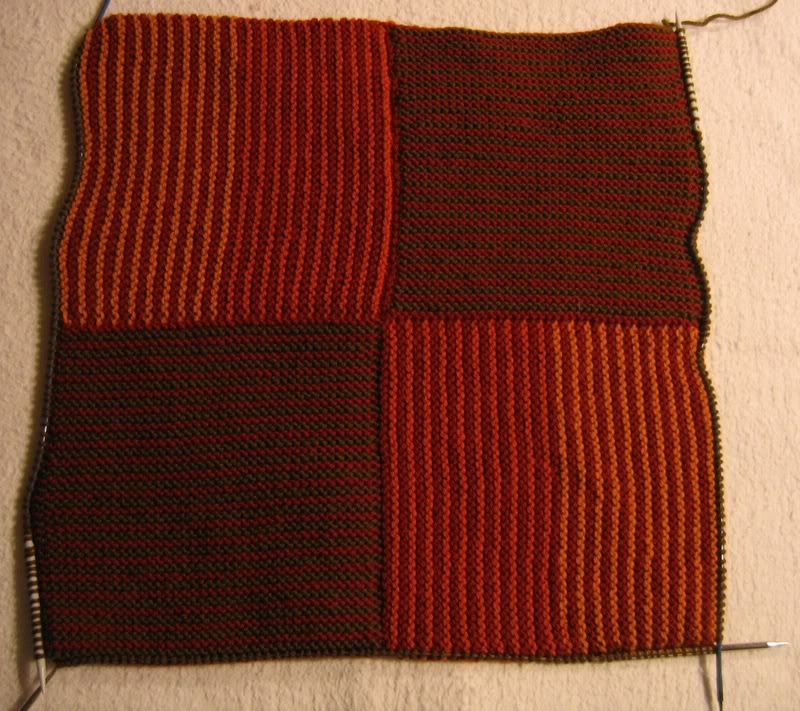
Here we see the bottom joined in real life.  You can also see the provisional cast on of the two “20-stitch” sections of Rectangles 1 & 2 on the righthand side of the knitting.

MiteredTite003.jpg

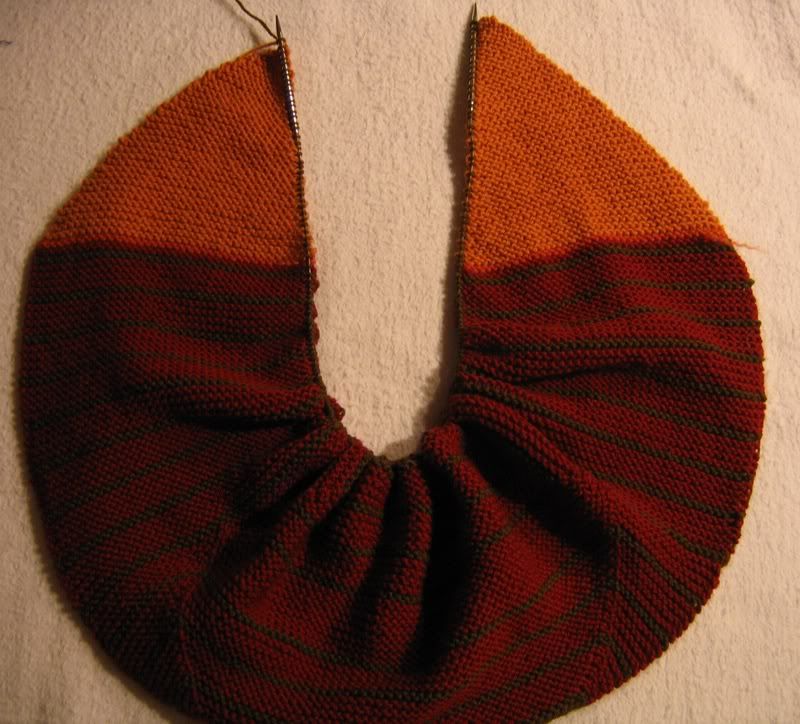
Here we see the 40 sts I picked up along the lefthand side of the bottom as they are knit to form the sides of the mitered bag. 

MiteredTite002.jpg

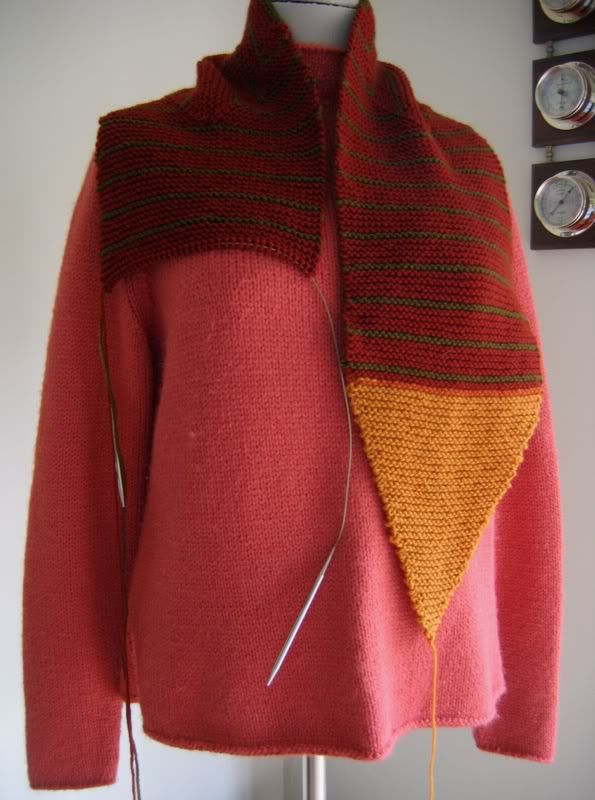
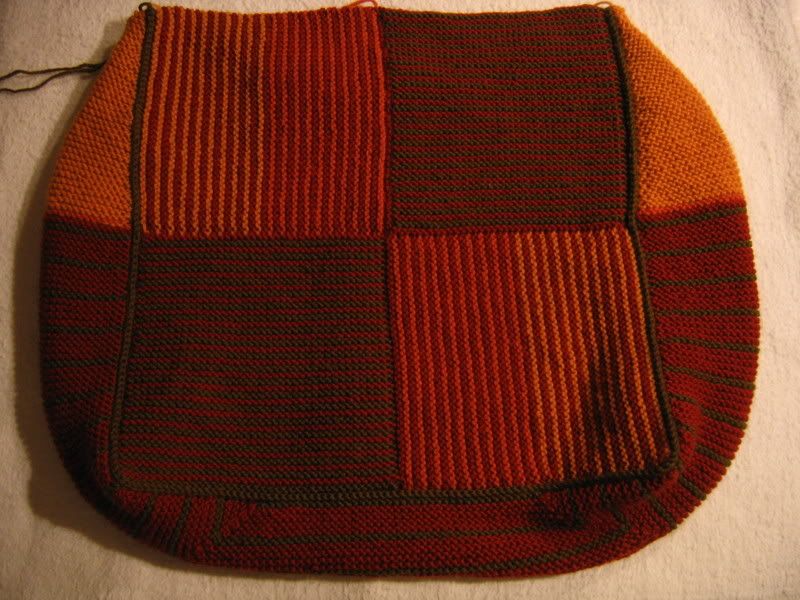
After the square is knitted, you work a tringular shaped piece that tapers to the top of the bag.

MiteredTote5-27-07.jpg

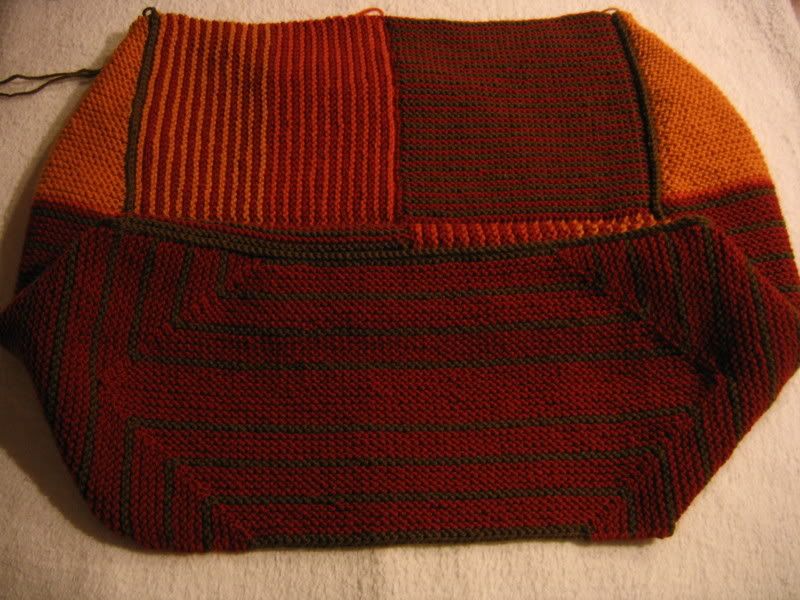
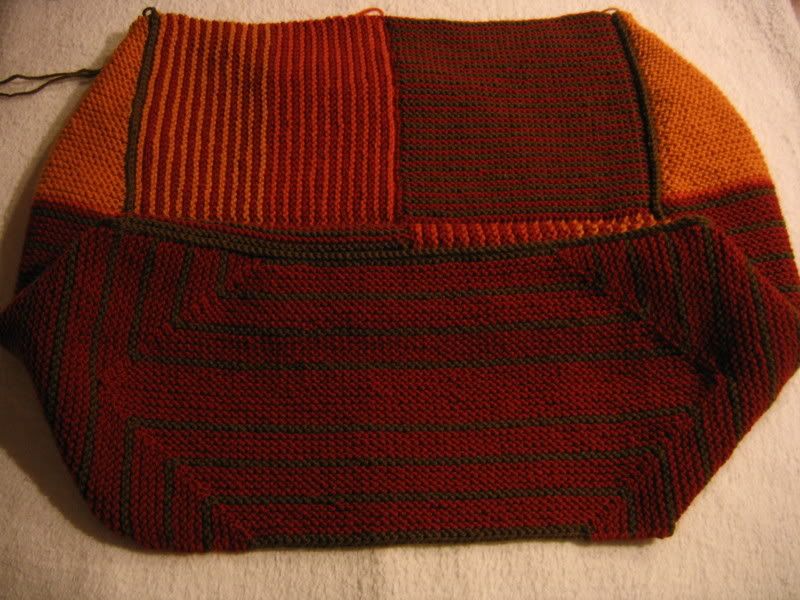
Here you see how the bottom and sides are joined to the front of the bag.

MiteredTote013.jpg

There are not really “flaps” at the top, but insets to form the sides of the bag.  I hope this is helpful. 

And, Lisa, please forgive Sally’s attempt to “help” – I don’t think she’s had any modular training. 😉

June 3, 2007

From Susan — Throw Me a Line!

Filed under: Peacock Shawl -- Susan's — lv2knit @ 1:10 pm

Let’s recap: The purpose of a lifeline is to provide a place in your knitting that you can rip back to if necessary.  The key to a lifeline is that all before it must be error free, or why didn’t you fix it already?  I have been placing lifelines at the end of each chart on the Peacock Shawl — except for Chart #6.  Why?  Because I was so excited to start on Chart #7 that I forgot. 

So, I had just finished Row 9 of Chart 7 and decided I better put in a lifeline – I did NOT want to have to rip back all the way to Chart 5 if a mistake reared its ugly head.  Before setting the lifeline, I knew I had to validate that there were no mistakes, and I was quite confident that I had it all going on!  I was cooking along and paying attention and every row was lining up with the previous row.  Au contraire, Over-Confident One!  There was a serious mistake in the very center of the shawl.  I decided to purl back halfway to the center and fix it on the back side because it was such a chore to pick out the sts one by one over hundreds of sts.

Yes, you guessed correctly.  I could not fix it, so now I had to rip out the half a purl row AND the last half of the knit row.  It took forever. I still could not figure out what I did, but did eventually fix it.  I finished up the row and decided that I better hurry up and set my lifeline.  I recounted to validate the perfection of the row and — tada — there was ANOTHER mistake!!!!!  AAAAARRRRRRRGGGGGGGGHHHHHHHHH!!!  This was easily fixed, but I’ll tell you — lace is an easy thing to botch.  You think you are really paying attention and a yarnover passes you by.

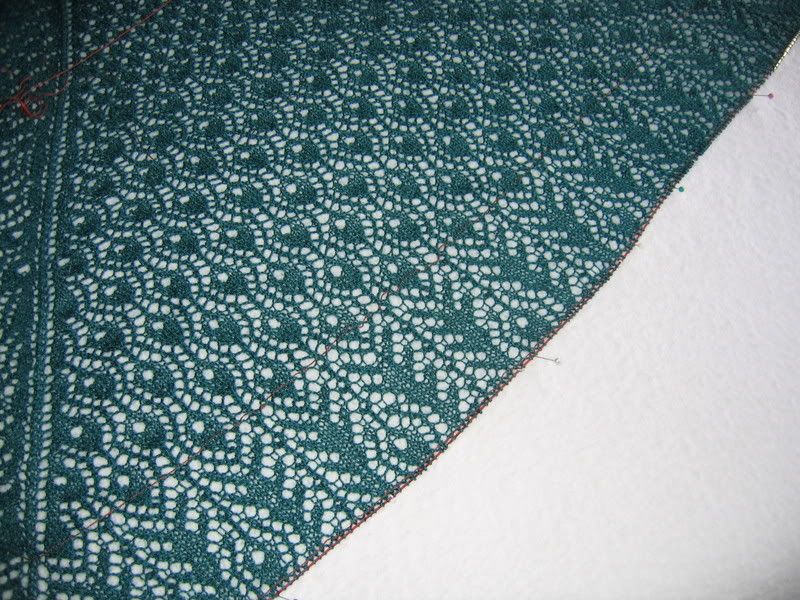
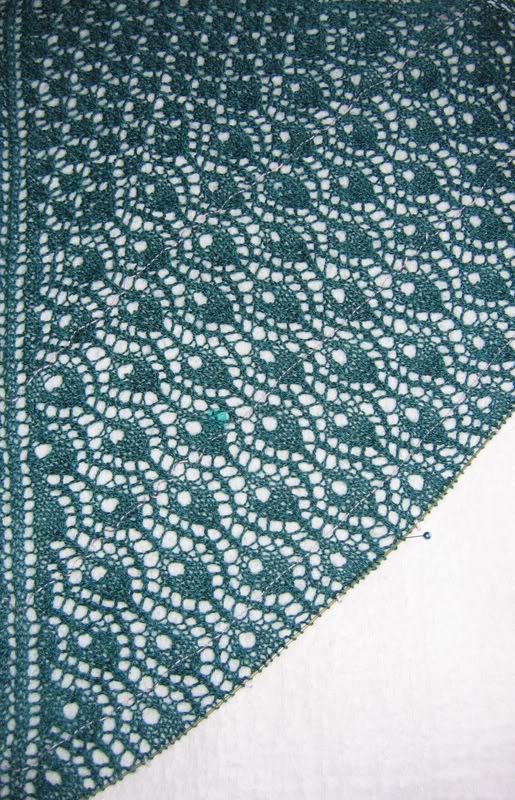
Here I am on Chart 7.  It is deceiving because Chart 7 is the final chart before the edging, so you think you are nearing the end.  But, I am probably only 50% done with the knitting.  It is true!  Chart 7 is ~50 rows and each is getting longer.  Plus the edging is deep. 

Peacock6-3-07001.jpg

Peacock6-3-07003.jpg

I feel much better now that I have a lifeline.  I may place one every ten rows or so just to feel more secure.

The great part of my knitting this weekend is that I watched Pride and Prejudice and knitted much of the day yesterday.  Oooh Baby — Mr. Darcy is one cute dude (any excuse will do to show this again ;)).

Mr.jpg
“And your parents are doing well?”

PS — I keep having trouble with the center — and it is nothing!!  What is my problem?  NOTE: Rhetorical question 😉

June 1, 2007

From Susan — Inquiring Minds

Filed under: Uncategorized — surly @ 9:53 am

Some of you asked about where to get the Mitered Tote pattern:
if you are interested in making your own Modular Felted Tote Bag (which I kept calling the Mitered Tote by accident!), you can get the pattern from The Yarnery in St. Paul: 651-222-5793.  Theresa Gaffey works there and has created many nice designs.

May 31, 2007

From Susan — A Glimpse into the Creative Mind

Filed under: Back Story,Designing,Peacock Shawl -- Susan's — lv2knit @ 8:47 pm

I stumbled onto a wonderful tidbit last evening as I was roaming the internet.  It is an article by Dorothy Siemens, designer of the Peacock Feathers Shawl, on the site Knitting Beyond the Hebrides.  In this piece, Dorothy describes the design process she went through in creating her Peacock masterpiece.  She also discusses some of the response she has had to the design by those of us who long for a Peacock of our own. 

It is a very fun read and really lets you in on the ups and downs of design.  I do not profess to be a designer in Dorothy’s league by any stretch of the imagination, but the frustrations and “indirect route” that define the landscape of knitting design are very familiar territory.  I have often said that a sweater designs itself, though very cryptically.  You have an idea in your head, but it will not let you get there.  It will take you where it needs to go, but you find it only by trial and error. 

I emailed Dorothy in what amounted to a gushy fan letter and her response was so warm and generous — very cool!!  It is wonderful that we have the opportunity to recreate all the gorgeous shawls she has designed — see them at Fiddlesticks Knitting.  Thank you, Dorothy! 

May 30, 2007

From Susan — Seabiscuit by a Nose!!

Filed under: Uncategorized — lv2knit @ 8:11 pm

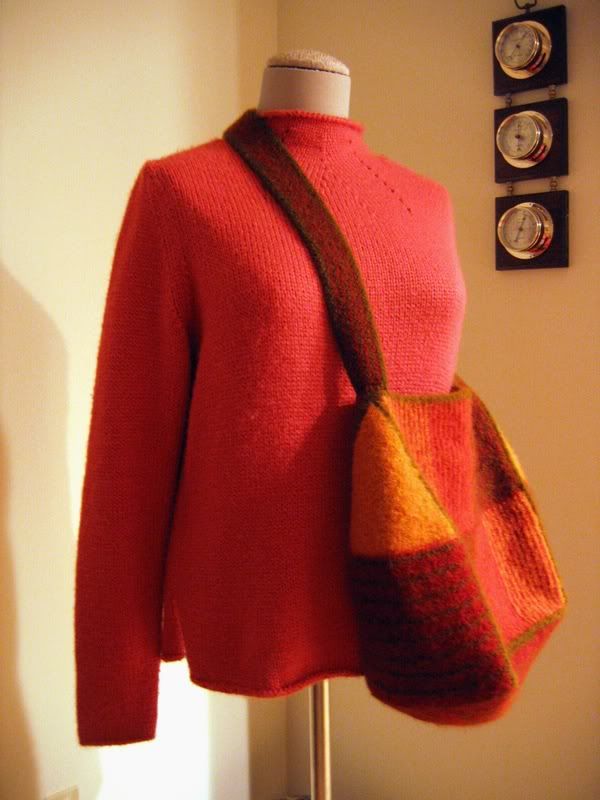
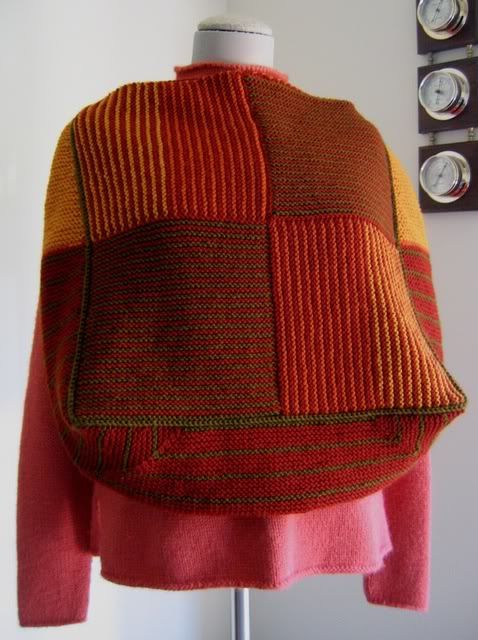
Why don’t cameras do these things justice!  I really tried to get a GOOD picture of the felted Mitered Tote — to no avail! I wish you could see it in person. 

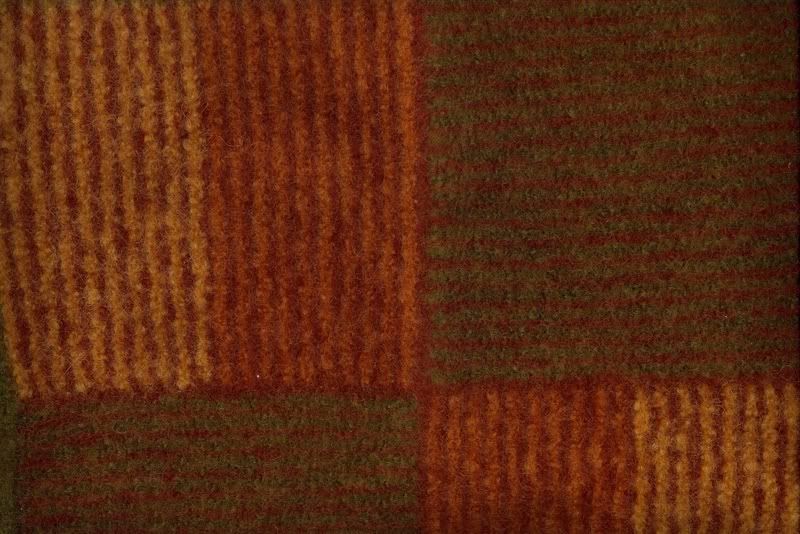
Here’s a close up of the felting:

MiteredToteFelted.jpg

It is felted to a nice degree: nicely dense and not stretchy.  And it has the boucle finish that I wanted.  Even Hubby commented on how great it looked felted (and he usually just does the ‘uh, looks good’ without looking up thing).  Here you can at least see the difference in size after felting:

MiteredTote015.jpgMiteredToteFelted006.jpg

MiteredToteFelted008.jpg

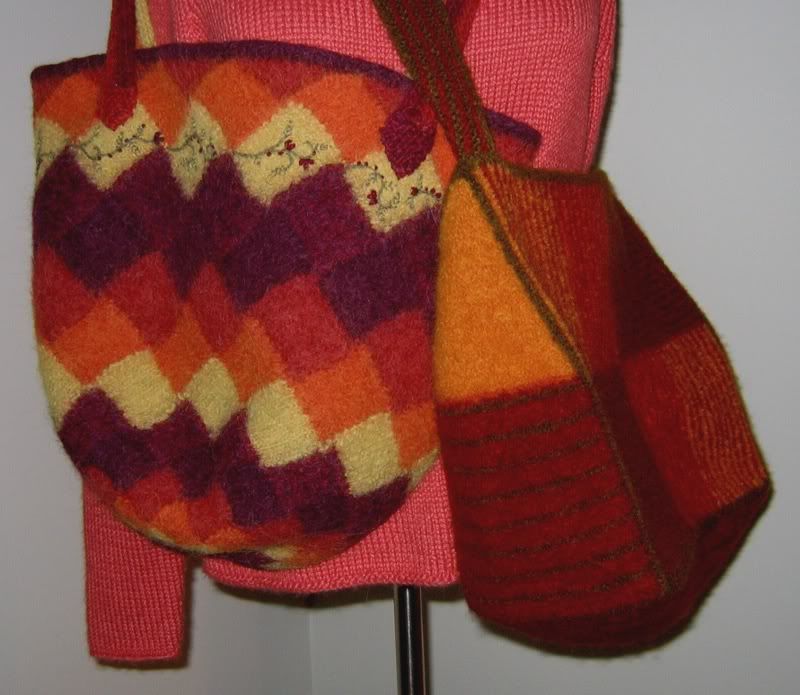
And Lettie asked, why does Mommy keep making felted bags in the same colors…..???

MiteredToteFelted011.jpg

Lettie, dear, we have a “Don’t Ask, Don’t Tell” policy around here and you better get used to it ;)!  The above picture (showing one of my many Market Squares bags) is much truer to the color. 

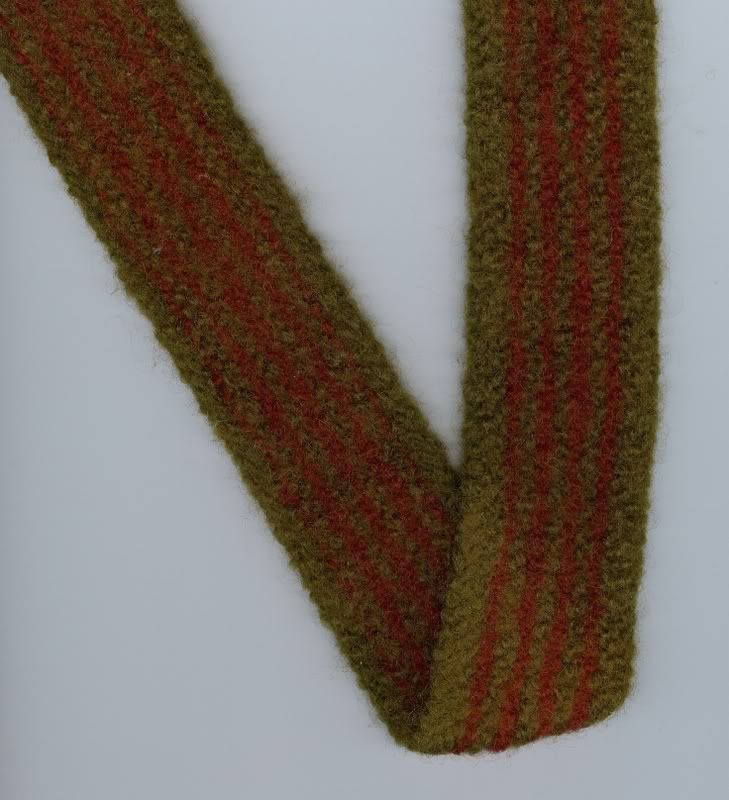
I am extremely pleased with the strap I ended up doing.  I used a provisional cast on for 160 sts; then I worked stripes in the green and red, and did an i-cord bind off all around.  It is the exact width and length I wanted and it felted very nicely, too!! 

MiteredToteFeltedStrap.jpg

So, all in all I am very pleased with the bag.  I do need to ask myself how many is too many, but Sally keeps knitting shawls, right?  Can there be too much of a good thing?

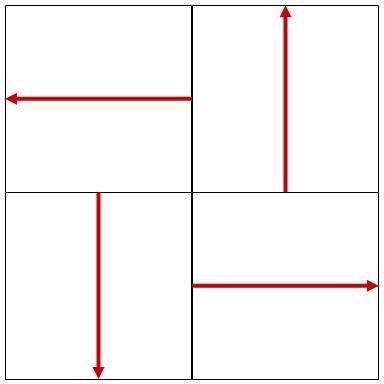
PS — in response to questions — a couple of you wondered about the felting and the fact that knitting usually felts more in one direction than the other.  I’m no expert, but it could be that it felted evenly because the knitting goes in all directions:

Slide1-10.jpgArrows show direction of knitting

This is not the case with the bottom of the bag, but …

May 29, 2007

From Sally — Cap Shawl Border Update

Filed under: Cap Shawl — surly @ 5:39 pm

I’m very slo-o-o-o-wly puttering along on the border for my Cap Shawl from Victorian Lace Today. As I said in an earlier post, I first had to deal with a few little issues. To recap (get it, Re-Cap; okay I apologize for that already):

1. The chart was in garter, not stockinette (even though it was knitted in stockinette), so I changed it. (That, of course, took all of two seconds.) I just didn’t think the border would look right in garter; the rest of the shawl is all stockinette.

2. I didn’t like the rows of plain stockinette in the middle of the pattern repeat. On one hand, that provided an easy spot to use when grafting the beginning and end of the border. On the other hand, I didn’t like it. So, I took out those rows and then adjusted the math to make the number of stitches fit with the border repeats. So far so good.

3. My final little challenge was deciding how I wanted to knit the border to the shawl. [Quick aside for those who have never done this: When you knit a border onto a square or circular shawl where all the shawl stitches are still “live,” you work one stitch from the border together with one stitch from the shawl every other row. In other words, two rows of knitting decreases or “binds off” one shawl stitch. You then typically slip the new stitch on the next row instead of working it. It was how to work the two stitches together that I was thinking about.] The pattern directions told you to knit one border stitch and one shawl stitch together through the back loops on a wrong side row. I would need to do it differently because I wasn’t working it in garter. The instructions also told you to slip the stitch purlwise with the yarn to the right side. I think what she wanted was for the slipped stitch to be to the wrong side, and turned (not flat). I’m not quite sure how to describe what I mean.

This, except for its being stockinette, is how I think the shawl was supposed to look. It’s fine, and if I kept going I would have lived. But I was somewhat dissatisfied. (I purled two together through the back loops and slipped with the yarn to the right side.)

Here, I purled two together — leaving the slipped stitch on the right side. If you’re really observant, you’ll realize I’m knitting this experiment counter-clockwise, instead of clockwise. I decided the top edge looked nicer when I did it clockwise, so I stopped and started over again.

I’m not even going to bore you with some of my other variations. Can we say “just give it a rest already?” Therefore, after many (probably unnecessary) stops and starts, I knitted it clockwise: purling the two stitches together (with no twist) and slipping the stitch with the yarn to the wrong side. Do I love it? No. But it’s just a shawl, not the love of my life, so I’m finishing it and moving on. I haven’t made much progress, but that’s because doing a border this way is slow and I’ve had very little time to knit in the past week or so.

Here, for those of you who haven’t done this, is what it looks like as you knit:

Here’s a more “distant” shot, which reminds me that no one is going to be examining the border with a magnifying glass (I hope). I know it will also look so much prettier once it’s blocked. (It will, won’t it? Yes, lying is allowed. Possibly even encouraged.)

Finally, here is my photography assistant. (This is my daughter’s Chihuahua puppy. He’s always a big help.) Blame him for any shots that are out of focus.

May 28, 2007

From Susan — All Shall Be Revealed!

Filed under: Uncategorized — lv2knit @ 9:44 am

Finally I am at the point on the Mitered Tote where it all comes together. When I last left you, I was finishing up the “scarf” section. It wrapped up quickly (as garter stitch scarves tend to do ;)) and then it was on to the construction phase. I chronicled this phase in photos so you could see how nicely the bag comes together (and because it is too hard to describe in words alone).

First, pick up 240 sts around three sides of one of the large squares:

MiteredTote007.jpg

The “crinkled” edge is due to the fact that I am using Denise needles for some of the pick ups — I didn’t have enough Size 8 needles, and it takes a lot for this project.

Then pick up 240 sts along one edge of the “scarf”:

MiteredTote009.jpg

Join the pieces together using a 3-needle bind off (I used a Size 9 needle to do the bind off):

MiteredTote011.jpg

It gets a very nice-looking edge — similar to piping. Here’s the bottom, where the true miter is hiding:

MiteredTote013.jpg

Repeat for the other side and voila:

MiteredTote015.jpg

You’ve got one honkin’ big bag!!!!! Whoa! That’s a stash-keeper if I ever saw one.

The next step: the top edge. The pattern says to pick up and bind off, but I chose to do an i-cord bind off to give it a clean and bit heftier appearance:

ICordEdge.jpg

Now it’s time to knit the strap. A fellow knitter who made this bag suggested that I make the strap wider to be more in scale with the bag’s girth — and I agree tote-ally. I have been playing around with different ways to make it wider and finally came up with a plan that I hope works — we’ll see in the next installment of the “Mitered Tote Turns” ;)! I’ll knit like Seabiscuit between loads of laundry today…

I hope to be able to felt this puppy this week. Woo Hoo!

May 26, 2007

From Susan — Hey, Lady, Nice Scarf!!

Filed under: Lace Style Cardigan,Peacock Shawl -- Susan's — lv2knit @ 9:08 pm

I am back in knitting form.  Still sickly, but not too sick to knit, thank goodness!  And thanks for all of your well wishes.  It really was nice to get some sympathy from across the miles (I got too little at home!).

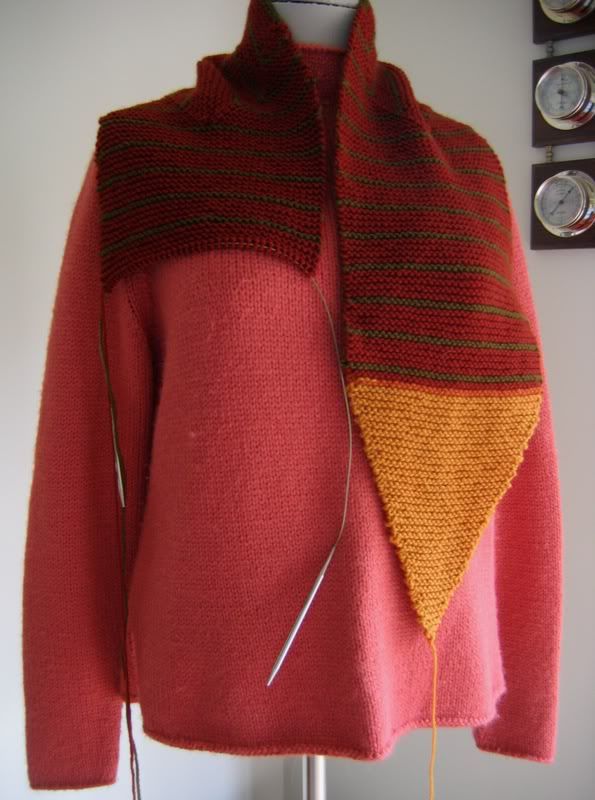
On my infrequent travels, carrying around my portable project, I keep getting asked if I’m knitting a scarf – hmmmm, what gives?  Why would they think the bottom of a felted bag was a scarf? 

MiteredTote5-27-07.jpg

Yeah, I know.  It looks very weird and not like a felted bag at all!  It will all become clear soon, I hope (noting that crossed fingers make typing difficult).  I’m on the final stages of the knitting but there is a fair amount of finishing, not to mention the double I-cord strap.  So, this is not yet in the “Finis” category.

I also worked a little more on the Lace Style cardigan:

LaceCardi.jpg

I think I’m to the underarm shaping, but you realize that means a commitment to length ;).  We all know how hard it is to do that, now don’t we??  I’m pretty sure I’ve got it close.

And could I forget My Precious?  Never!  I am now at 22% and on the 5th chart.  I now agree with Surly that my calculation method is fiendish.  It is much better to con yourself into believing you have a magic skein of yarn!! 

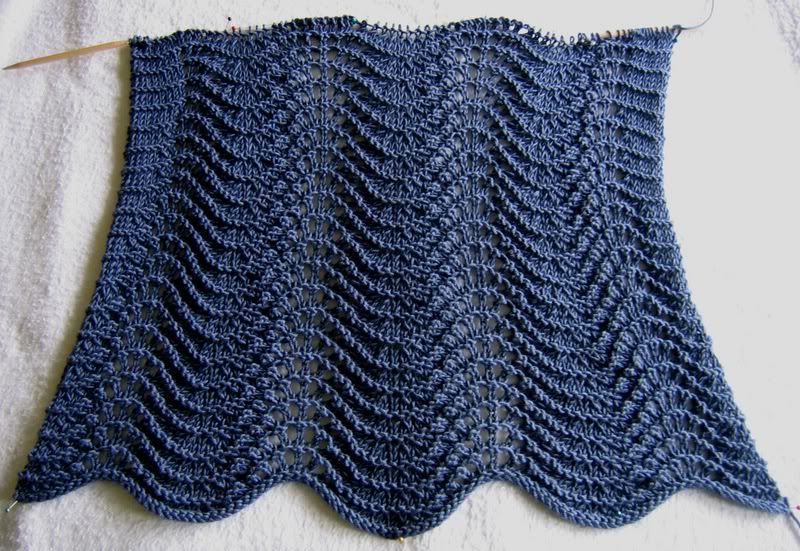
Peacock5-27-07.jpg

If you look at a picture of the shawl’s details, you can see where I am in the big scheme — I’m in the middle section of the feathers.

I just got back from Pirates of the Carribbean: Dead Man’s Chest.  There’s a lot to like and a lot to not like — it’s a LOT of movie.  But it was fun.  Now I guess I’ll have to go see the other “3’s” — Spidey and Shrek.

Have a happy and safe Memorial Weekend.  If you have someone special to remember this weekend, as Sally and I do, please share our warm thoughts for you and yours. 


May 24, 2007

From Susan — Viral Spiral

Filed under: Back Story — lv2knit @ 11:31 am

I have not been knitting or blogging — due to illness!  Yesterday I came home from work early and was too sick to lift my head off the pillow — I was TOO SICK TO KNIT!!  Mark your calendars — that is one of the only days in recent memory that I did not knit a stitch.  I’m not feeling that perky today, but will try to muster a little knitting. 😉

PS — thanks for all your kind words.  I did manage to get a few rows in today!

May 22, 2007

From Sally — Cap Shawl Update

Filed under: Cap Shawl — surly @ 5:39 pm

Is it permissible to post without photographs? *looks around nervously for the blog police* Alrighty then.

I’m finished with the knitting of the Cap Shawl and have been for a couple of days. I’ve been too busy (with jury duty and whatnot) to get a good start on the border, but it was causing me some issues anyway. I’ve started it and ripped it back several times. I now think I know how I will knit it, and once I get going it will be fine.

These were some of the issues:

1. I don’t think the border chart, which is a very simple one, matches what was actually knit on the shawl. The chart is written as if it were knit in garter stitch, but the photographs of the border look like stockinette. (Similarly, the last few rows of the shawl chart show some purl rows which I think were intended to be garter stitch; however, the knitted piece is done in all stockinette as far as I can tell.) The author uses the identical border for the Maltese Shawl/Scarf pattern later in the book. In the photographs of the Maltese, the border is knit in garter stitch as shown in the chart. The difference is noticeable. This was a bit of an issue for me because her method for joining the border as you knit along assumed you would be knitting the wrong side rows. I want to do mine in stockinette and so I will be purling. So I had to make a few adjustments there.

2. Every other time I’ve done a knitted on border, I’ve had the shawl stitches on my left needle and knit the border on as if I were moving counter-clockwise around the shawl. This border is charted so that the shawl stitches are on the right needle, and you add them clockwise. I thought about flipping the chart so I could do it in my usual manner but then decided against it.

3. There are three plain rows in the center of the chart (two purl rows and a plain row with no yarnovers in between them). When I started the border, I decided that it looked funny to have those rows there — something looked a bit off-center. At Sue’s suggestion, I eliminated that bit of plain knitting. I think it looks better. Of course, that changes the number of rows in the chart, which means I have to fiddle a bit as I go so that I have the correct number of rows so that I the number of full repeats matches up with the number of live stitches on the shawl.

It takes two rows to eat up one live stitch on the shawl. I have 738 stitches and my new chart has 28 rows. That means that I get rid of 14 stitches per full repeat. I need 742 stitches for the repeats to work out. In other words, I will be four stitches short, but I can easily add those by creating an extra stitch four times.

So, that is where I am and what I’ve been doing. I have a little bit of the border finished, but I need to rip it because I changed one last little thing in my plan.

I’ll post photographs as soon as I have enough to make it worthwhile.

From Susan — just a little comment: I just bought a “new” car (2004 Chrysler Pacifica, cuz I knew you’d ask!) and today I finally got to put my vanity plates back on — LV2KNIT rides again!!  It really did not feel like my car until I put those plates on it.  Honk if you see me!! 😉

« Newer PostsOlder Posts »

Powered by WordPress